Learn how to quickly press flowers and leaves using a microwave oven or iron, or use the traditional method with a flower press or heavy books. Includes 25 creative ways to use your pressed botanicals.
For more ideas also see Art and Craft Projects from Natural Materials.

Getting Started With Pressing Flowers and Leaves

I’m sure I don’t have to persuade you that pressed flowers and leaves make wonderful art and crafts.
The one thing to keep in mind is that dried botanicals are delicate.
The process of pressing flowers or leaves means you are removing much of their moisture, drying them out as they are flattened in a press.
Pressed flowers can be brittle and require a careful hand.
If you are not used to working with fine materials, you may want to handle them with tweezers to avoid breakage.
Once you start drying your own plants, you’ll quickly see which ones retain their colors and work best for your crafts.
If you do not want press your own, you can also purchase ready-to-craft pressed flowers and leaves online or check craft or scrapbook sections of shops.
Contents
- Traditional Methods: Flower Press or Heavy Book
- Fast Method: Microwave Oven
- Fast Method: Iron
25 Pressed Flower Art & Craft Projects
How to Press Flowers & Leaves

It’s easy!
Choose fresh flowers and leaves and consider whether the plant structure will allow you to press them flat, or, if it is best to dissect them and press the parts.
For example, pansies have individual petals, making them easy to flatten. Any flower with overlapping petals or a bulky receptacle (the part that holds the flower leaves or petals in place) like a rose or poppy, may require dismantling into parts or slicing a cross-section (if you can) first. But no worries: either way, you will end up with some beautiful and interesting pieces.
Also, don’t forget about indoor flowers. If any houseplants are producing a lot of flowers, snip off a few and press those too.
1Traditional Flower Press and Heavy Book Methods
I group these two together because they’re essentially the same. This is the slowest—but completely reliable—method, taking a few weeks for the plants to dry.

- You can buy a traditional flower press (StudioKaramelo – Etsy Shop), make one, or simply use some big, heavy books.
- Place specimens between absorbent sheets of paper and place in press or between pages of book.
- Do not overlap any of the flowers or leaves on each sheet.
- Bulky items should be done on their own, to ensure even pressure.
- Apply pressure by tightening bolts or place additional, even weight on top of book.
- Depending on thickness and moisture levels, flowers and leaves can be ready in 2-3 weeks.
- Some crafters like to check on the pressings every few days and change the sheets as needed. Others wait it out. I generally wait it out because I forget to check!

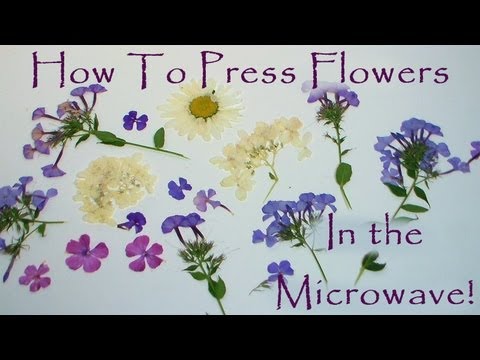
2Fast Microwave Method

This method is super fast but it does require some care to get your heat applications just right, without over-doing it.
You can buy or make a microwave flower press or make one using two ceramic tiles, cardboard, and thick elastic bands.
- Commercial microwave flower presses come with fabric inserts that will absorb the plant moisture.
- Place specimens in press or between paper sheets in your homemade microwave press. Some crafters use paper towel instead of paper; others say the texture of the paper towel can leave unwanted imprints on the petals.
- Do not overlap any of the flowers or leaves on each sheet.
- Follow instructions provided with commercial press. It’s going to vary for homemade ones so you are doing this entirely at your own risk, testing what works. For example, you might zap the flowers in the press for 20 seconds on medium, let them cool, check them, and if they need more, repeat it.
- Thinner flowers and leaves may be ready after 1-2 zaps. Thicker botanicals may need more zaps or additional drying in a press.
Resources
- Microwave Flower Press | Amazon
- Microwave Pressed Flowers Book | Amazon
3Fast Iron Method
Easy does it! This method is also quick but requires careful attention so you do not over-dry or burn the plants.
If you have ever done iron-on transfers to t-shirts, this is a similar method. But instead of pressing an iron on paper to transfer an image, you are pressing the paper to dry out the flowers and leaves underneath.
I have not tried this but here’s the basic method (at your own risk, as always):
- Place specimens between sheets of paper.
- Warm dry iron (no water) on low setting.
- Gently press paper with iron. Move the iron slowly, careful not to displace the flowers.
- Stop, allow paper to cool, and check flowers every 20 seconds. Repeat until done.
Watch Pressed Flower Videos
25 Pressed Flower Art & Craft Projects

Click on the links for project tutorials and more information.
- Beeswax bowls | Empress of Dirt
Make votive candle bowls from beeswax and add pressed flowers - Coasters | Hearth & Vine
Press flowers and leaves between prefabricated glass coasters - Greeting cards | Use a glue stick to adhere pressed botanicals to cards
- Teacher appreciation gift | Blooming Homestead
Pressed daisy in glass frame with quote.

Here are a whole bunch of items you can embellish by attaching pressed flowers and leaves with Mod Podge:
- Candles
- Decoupage canvas art
- Decorative eggs
- Dishes, cups, glasses, plates, bowls (clear glass)
- Framed art
Display pressed flowers and leaves on their own or on top of other art - Glass table top
- Lampshade
- Lanterns and luminarias |
Attach pressed flowers and leaves to wax paper or glass squares. - Mason jars
- Oil bottles
- Ornaments
Decoupage pressed flowers and leaves to existing ornaments or make your own from clay. - Placemats
Decoupage pressed flowers and leaves on placemat and top coat with Mod Podge. - Sun catchers
Use wax paper or panes of glass. - Switch plate
- Window (repurposed)
Beauty
- Bath fizzies
- Botanical soaps
- Jewellery: rings, necklaces, earrings
Paper / Stationary
- Bookmarks
- Gift tags
- Handmade paper
- Phone case
You can also use natural materials like this to make ice suncatchers for the winter garden.
I hope you’ll try pressing flowers and leaves and dig in to some of these projects.
~Melissa the Empress of Dirt ♛

How to Press Flowers & Leaves Instantly With a Microwave Oven
Equipment
Supplies & Materials
- 20 Flowers and leaves dry
Instructions
- On a dry day, gather flowers, leaves, stems, and seed pods from garden.
- Remove any diseased or moldy matter.
- Slice or cut as needed to allow specimens to lay flat.
- Place each item individually between sheets of absorbent paper or fabric.
- Place in microwave press.
- Microwave on medium for 20 seconds, check, and repeat until desired dryness is achieved.