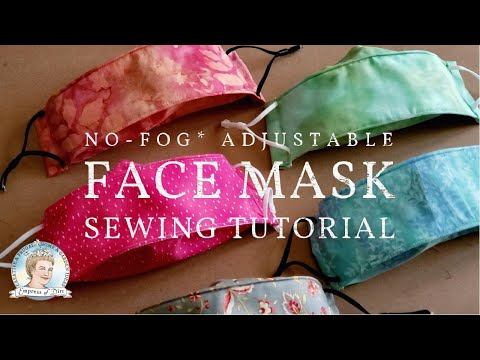
This homemade face mask prevents glasses from fogging up, is comfortable to wear, and provides some breathing space around the mouth and nose (also called ‘3-D’). Follow the step-by-step video tutorial to make your own.
If you enjoy frugality and handmade things, also have a look at Joyful Mending: Giving Loved Clothing a Second Life.

Make a Face Mask That Doesn’t Fog Your Glasses

As many of us scrambled to buy masks earlier this year, we soon learned that some are much better than others.

Two Things Matter When Choosing a Face Mask
- Is the mask effective? Will it do what it is intended to do?
- Is it comfortable?
And these go hand-in-hand. It can’t do its job if we aren’t comfortable wearing it and constantly adjusting it or fighting the urge to remove it. And yes, we all want to remove them but we are where we are.
Whether you buy or make face masks, I strongly encourage you to first read up on the latest findings to be sure you are making the best choices for materials and design for safety and comfort.
Type of fabric, how dense it is (the weave), number of layers, and so on all make a difference.
What I show here is for information only and is not medical advice.
Why Make Face Masks?
If your situation is like mine, we will likely be wearing masks for some time.
Making masks is fast, easy, and frugal.
Once you find a pattern you like, you can have fun with fabric choices and embellishments.
By owning several—or more, you can wash them after use and always have several ready to go (car, knapsack, pocket, and so on).
Features of This Mask
- Anti-fog design | The encased nose wire allows the top edge of the mask to fit snugly against the face.
- Comfortable | The soft cotton feels nice against the skin.
- Room to breathe | The 3-D design creates some room around the mouth and nose instead of the fabric moving in and out with each breath.
- Adjustable | The type of ear elastics used allow for size adjustments as elastics stretch over time.
- Washable | Can go in the washer and dryer (or hang to dry).
There is no one-style-suits-all mask.
I have made over a dozen masks from online patterns and finally settled on one made by Orange Dot Quilts on YouTube which I have modified here. She came up with her design early on (well done!) and I made changes after sewing a few samples.
If you enjoy sewing like I do, I hope you will go on to make your own customizations as well.
Keep reading for the tutorial and a list of suggestions for variations including resizing and style options.
How to Sew a No-Fog Face Mask

Supplies
For one adult-size, washable, no-fog face mask.
- 10×16-inch (25 x 40 cm) piece of cotton fabric (600 thread count is a recent recommendation).
- 7×7-inch (18×18 cm) square of low-loft all-cotton quilt batting or another piece of fabric (does not have to be batting). The Government of Canada currently recommends using a layer of non-woven polypropylene fabric (cold wash only).
- (2) 2 1/4 x 4-inch (5.7 x 10 cm) cotton fabric pieces for binding.
- 2 Adjustable ear elastics (see them at Amazon – they have handy little toggles on them)
- (1) 3.5-inch (9 cm) Self-adhesive nose wire
- Sewing clips or pins
- Glue stick
- Thread (to match fabric)
- Sewing machine | This is the make and model I currently use
- Scissors
- Ruler and pen
- Iron | to press fabric | These mini irons are a good option too
Steps
Sew with me!
Making this mask is not complicated but it’s far easier to demonstrate it in a video than explain it in words. There is no sound in the video—just me showing how it’s made, step by step, with some captions to help.
I suggest you browse the video first to get an idea of the process, gather your supplies, and then play it as you make your mask.
Once you see how it’s made, if you have some sewing experience, you should be able to make a face mask in about 15 minutes (or less). After making a bunch, with everything ready to go, it takes me about 7 minutes.
It is even faster if you make them in batches, sewing each step for each mask one after the next.
Face Mask Variations

Fabric
The mask in the video is made with one 10×16-inch (25 x 40 cm) piece of cotton fabric.
You could also use two different 8.25-inch pieces of fabric and join them with one 1/4-inch seam to create a 10×16-inch piece. This way, the inside of the mask can be different than the outside fabric.
Batting
I like how the cotton quilt batting makes the mask rather firm and holds the fabric away from my mouth.
You could, however, substitute the batting for another piece of fabric.
Thread
A lot of the stitching is visible on this mask. Decide if you want to use a contrasting color to make the thread a design feature or pick something that blends in. Maybe it will depend on how nice your stitches look!
Size

This mask is adult size and should fit anyone with these approximate measurements:
A. Root of nose (between eyes) to tip of nose: 2-inches (which is the measure for Line A in video).
B. Tip of nose down to edge of chin: 3-inches (distance from Line A to Line B in video).
The easiest way to make a smaller version of the mask is to use a larger seam allowance when top stitching along lines A and B (increasing from next to the edge to 1/4-inch). This will reduce the overall mask size by one inch.
More Sewing Projects
~Melissa the Empress of Dirt ♛

Sew a No-Fog Face Mask
Supplies & Materials
- 1 10×16-inch Cotton fabric
- 2 2.25×4-inch Cotton fabric
- 1 7×7-inch Cotton quilt batting low loft
- 2 Ear elastics adjustable
- 1 3.5-inch Nose wire adhesive
- 1 spool Thread
Instructions
- Watch the video for complete instructions. The steps written below won't make sense without it.
- Place nose wire and batting within fabric and top stitch around nose wire. Use video for demonstration.
- Draw nose (Line A) and chin (Line B) lines and top stitch across Line A.
- Bringing right sides of fabric together, align bottom edges and stitch with 1/4-inch seam allowance.
- Turn mask right side out, straighten batting, and press everything with steam iron.
- Top stitch across Line B.
- Working from inside mask with nose wire at top, fold down top flap, clip, and top stitch in place.
- Repeat with bottom flap. Press with steam iron, then open flaps and press again.
- Mark spots 3/4-inch from each corner, join with pen line and cut off triangle as shown.
- Accordion fold both flaps as shown, aligning diagonal corners with edges of mask. Clip in place.
- Working from front of mask, clip ends of ear elastics in place as shown.
- Stitch everything in place twice using 1/8-inch seam allowance.
- Center binding pieces on each side of mask, aligning edges, right sides of fabric together as shown. Attach with 1/4-inch seam allowance.
- Working from inside mask, spread glue over binding and seam area as shown.
- Fold over 1/2-inch side edges of binding and fold remainder as shown, covering any visible stitching along edge of mask. Clip to hold in place. Repeat on other end.
- Finish mask by top stitching front of mask along binding seam.
Joan says
Haven’t made the mask yet, but the video and instructions are the most comprehensive I’ve seen. I hope this one will work out for me, as I’ve tried others, and none seem to fit well.
I’m not a real sewer, but definitely would like to be able to make masks for the myself and family. Thank you for such explicit directions.
Melissa J. Will says
Hi Joan,
I worked hard to demonstrate it clearly so I appreciate your words! There is no one-mask-suits-all but I hope this works for you.
Kathy says
Your video and instructions were perfect for me. Not too fast, but they allowed me to see and understand the instructions. Haven’t made one yet but I have everything laid out to begin. Thank you, Kathy.
Joy Wolfe says
Thank you so much for the great video showing step by step how to make this mask. I wear glasses and have made several types of masks, but they all seem to fog up. I am very much a visual learner, so even though I had printed the steps out, I watched your video and made my first no-fog mask along with the video. It was excellent! I hope to make more like this for my husband and my son who also wear glasses!
Melissa J. Will says
Thank you, Joy. So glad you found it helpful. It’s much easier to show in a video! I know one mask design can’t suit everyone but I hope you find it as fog-free and comfortable as I do.
Suzanne Phillips says
This is really nice and Helpful, I’m going to give it a try, soon. I made masks at the beginning of covid and used ties. They slip down and need constant adjustment. I didn’t know about the adjustable elastic available at amazon, so thanks for the tip, now I can fix them:) Also, will make some new ones based on this video as fogging is a problem for my family as 3 out of four of us wear glasses. God bless and thanks again.
Steve Bulford says
As a non sewing male with glasses and having watched the video I will say this is brilliant. The video was easy to follow and the design was simple but very functional. I am very fortunate as I have a crafting wive who would have no trouble putting this together. People need to remember that during this extraordinary time that success in defeating Coronavirus amounts to wearing suitable masks and social distancing along with good hygiene… I say this because I am lucky to live in Australia and we now have had
our first weekend of no positive cases since June. My very best wishes to for the future
Melissa J. Will says
Thank you, Steve, and cheers for taking any actions we can to protect ourselves during this very challenging time.
Susan Mulrooney says
Hi there . Are you selling your no fog masks ?
Melissa J. Will says
No, I’m not. Just happy to share my method for making them.
Kroeger Celia says
I wish you did sell them. I am not able to sew and would buy yours in a heartbeat to try out.
Melissa J. Will says
Have you looked on Etsy? Maybe you’ll see ones you like: https://tidd.ly/32GGhgb