It’s easy to create delightful charms for your miniature fairy garden pond using polymer clay.
If you are brand new to using polymer clay, see my handy starter guide, Polymer Clay Charms 101.
Create Your Own Miniatures

Fairy garden accessories are not particularly expensive until you realize it takes lots of them to make a fabulous scene. Once you see how truly easy it is to make charms from polymer clay, I’m sure you’ll want to give it a try.
These are also great projects for older kids who enjoy this sort of thing. And, if they don’t want to make these miniatures, there are tons of tutorials on YouTube showing how to make all sorts of neat items (video game characters, tiny cookies and cupcakes, and anything else you can dream up). I’ve posted some of these videos at the bottom of this article.


Materials & Supplies

- Premo polymer clay (green). I like buy Premo multi-color starter packs to lower the cost per pack.
- Bamboo skewer
- Utility knife, exacto knife, razor blade, or paint scraper (for cutting clay)
- Clean, non-stick work surface (I use an old laminated shelf board)
- Chalk pastels (yellow, brown)
- Small craft paint brush
- Toaster oven or conventional oven. It is recommended you dedicate an old toaster oven to crafts only.
- Parchment paper (to line the toaster oven baking sheet)
- Polyurethane (clear-drying, matte or gloss finish)
- Clean up supplies: rubbing alcohol to clean work surface; see this post for hand cleaner recipe, white rag.
Understanding Scale
The secret to a great looking fairy garden is to pay attention to scale.
Unfortunately, many you find for sale do not conform to any particular scale and a fairy garden or dollhouse setting can end up looking really odd because nothing seems to go together.
An over-sized chair looks goofy next to a too-small table. You want everything to be in proper proportion to everything else the same way it is in our own homes and gardens.

A classic scale is 1:12. This mean each accessory is 1″ for every 12″ (foot) the same item would be in real life. For example, if a real lily pad is 12″ wide (one foot), a fairy garden lily pad should be one inch wide.
Pay attention to scale with every miniature you make or buy and your little world will look so much better.
Fairy Garden Pond Lily Pond Tutorial
1Form Clay into Balls

- Roll out one, small ball of green polymer clay for each lily pad. I did them in 4 different sizes.
- Polymer clay warms up very quickly in your hands. You don’t want to overwork it. Each of these balls took under 10 seconds to shape.


2Flatten Balls
- Press each ball flat into a circle.
- If you notice any cracks around the edges of the clay, it’s either not warm enough or too dry. Work it some more and try again.

3Cut Out Triangles
- Cut a small triangle out of each lily pad. Start each cut around the middle of the pad.
I use an old paint scraper to make cuts and slices. You can also use a razor blade (with a safety edge) or utility knife.

4Add Lines
- Use a bamboo skewer (or something with a fine tip) to make score lines through the lily pads. These represent the veins in the leaves.

5Add Pastels
- Scrape off some yellow and brown chalk from the pastels (I use an old cutlery knife).
- Dab brown chalk around the outer edges of the lily pads.
- Dab yellow chalk in the middles.
6Bake Clay
- Bake the clay according to the instructions on the package.
- My Premo polymer clay says to the baking time for clay that is 1/4″ thick for 30 minutes at 270 °F/132 °C.
- These lily pads are obviously much thinner than 1/4″ but I find around 25 is fine but don’t take my word for it! Your oven may be hotter.
- Allow to cool 5 minutes (or more). This is when the clay actually hardens.

7Apply Protective Coat
- Apply polyurethane (use a clear-drying type) if you like the shiny look (I do).
- If more than one coat is required, allow to dry thoroughly between coats per instructions on the product label.
All done!

The tutorial for making a polymer clay frog is here.
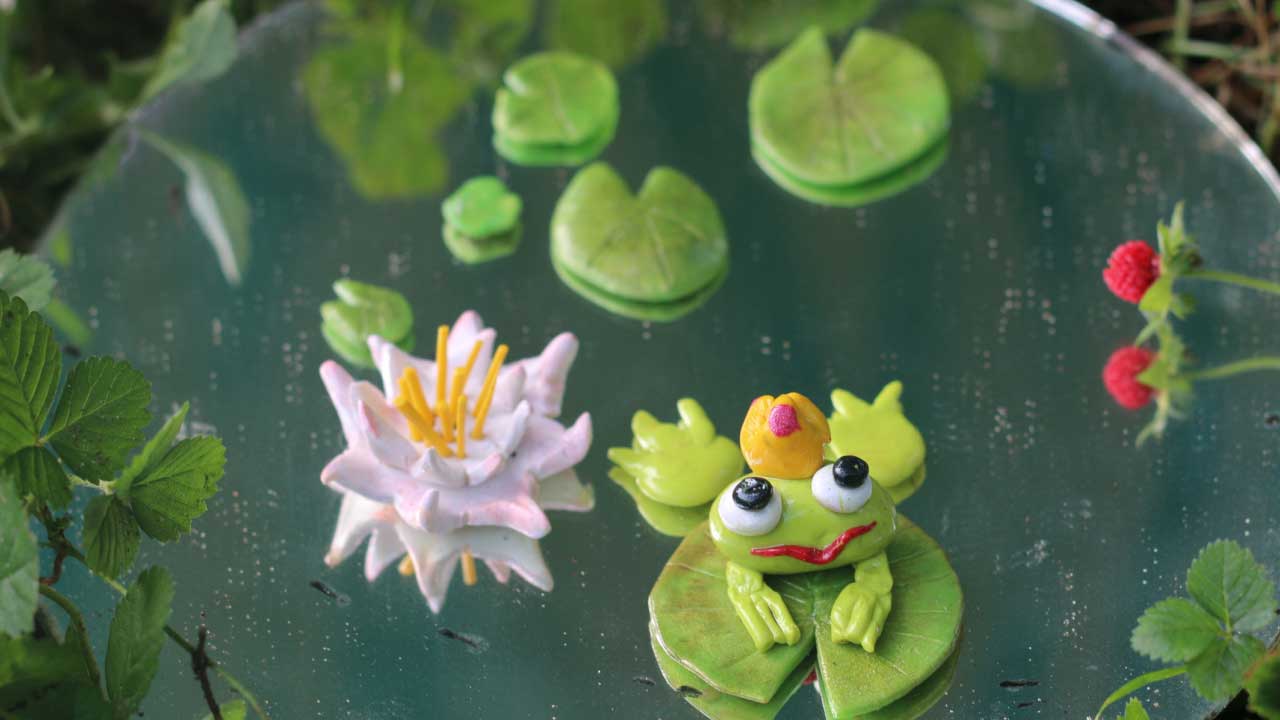
Easy Trick for Creating a Fairy Garden Pond
To make the pond you see below, I used an old piece of mirror. It’s also possible to make a pond using epoxy resins, but this is obviously much simpler and free (or very low cost).

The next step is to make some lotus flowers and a frog, of course. Let me know if you want any tips for making them.
Watch Polymer Clay Crafting Tips

Want living plants in your little garden? Here’s a guide to the best plants to choose for miniature gardens.
~Melissa the Empress of Dirt ♛