Turn a garden photo and keepsakes into a delightful 3-D display with this shadow box tutorial. It’s a fun way to preserve garden memories and create something beautiful to display indoors.
If you want to make your own miniatures, we have a tutorial here using polymer clay.
DIY Garden Shadow Box


Shadow boxes, junk journals, and scrapbooks may take different shapes, but they all spring from the same creative spark—gathering the bits and pieces we love and turning them into something beautiful and meaningful.
Whether it starts with a favorite photo, a pressed flower, or a ticket stub from a garden tour, these projects capture memories in a way that is meaningful and uniquely your own.
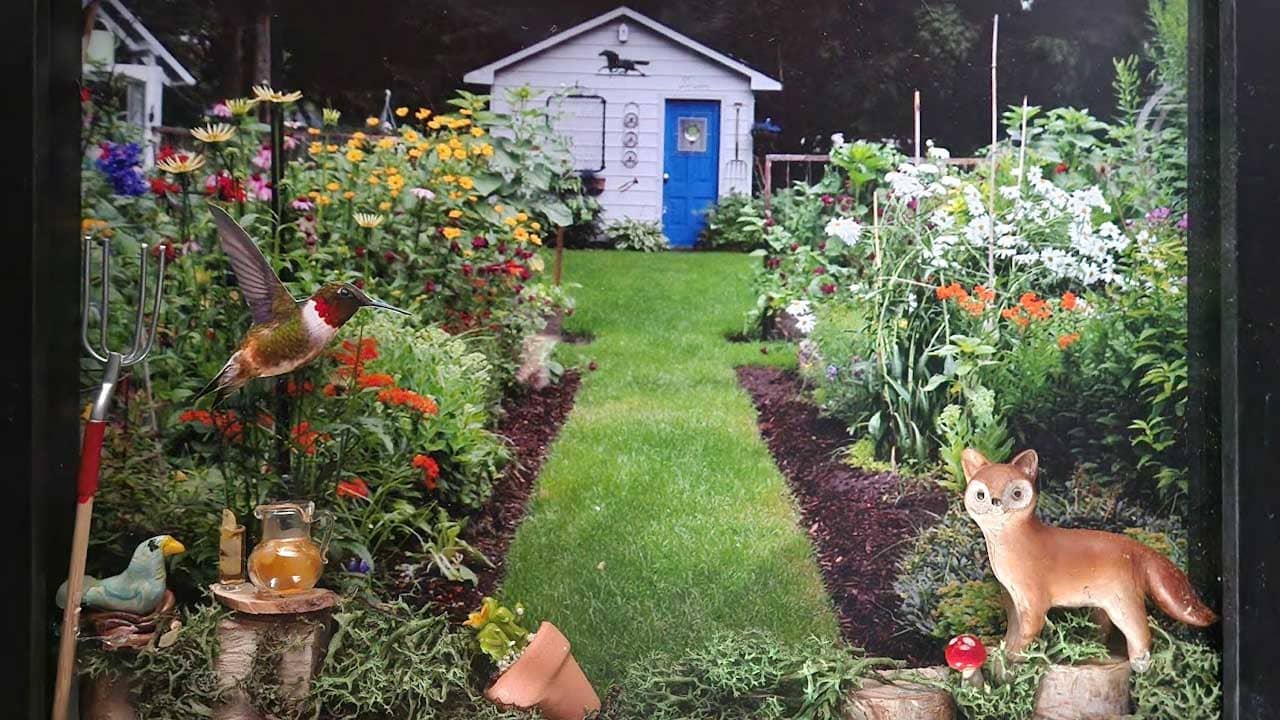
For this shadow box project, I’ve chosen a storybook style using a large garden photo as the backdrop and assorted garden trinkets and miniatures to bring it to life.
I’ll walk you through how it’s made and share some additional tips and ideas along the way.
What is a Shadow Box?
A shadow box is a deep, framed display case used to showcase objects, photos, and mementos in a visually interesting way.
It’s part collage, part memory box—perfect for turning meaningful bits and pieces into a decorative keepsake you can hang on the wall or prop on a shelf.
Supplies & Materials

My shadow box used the following:
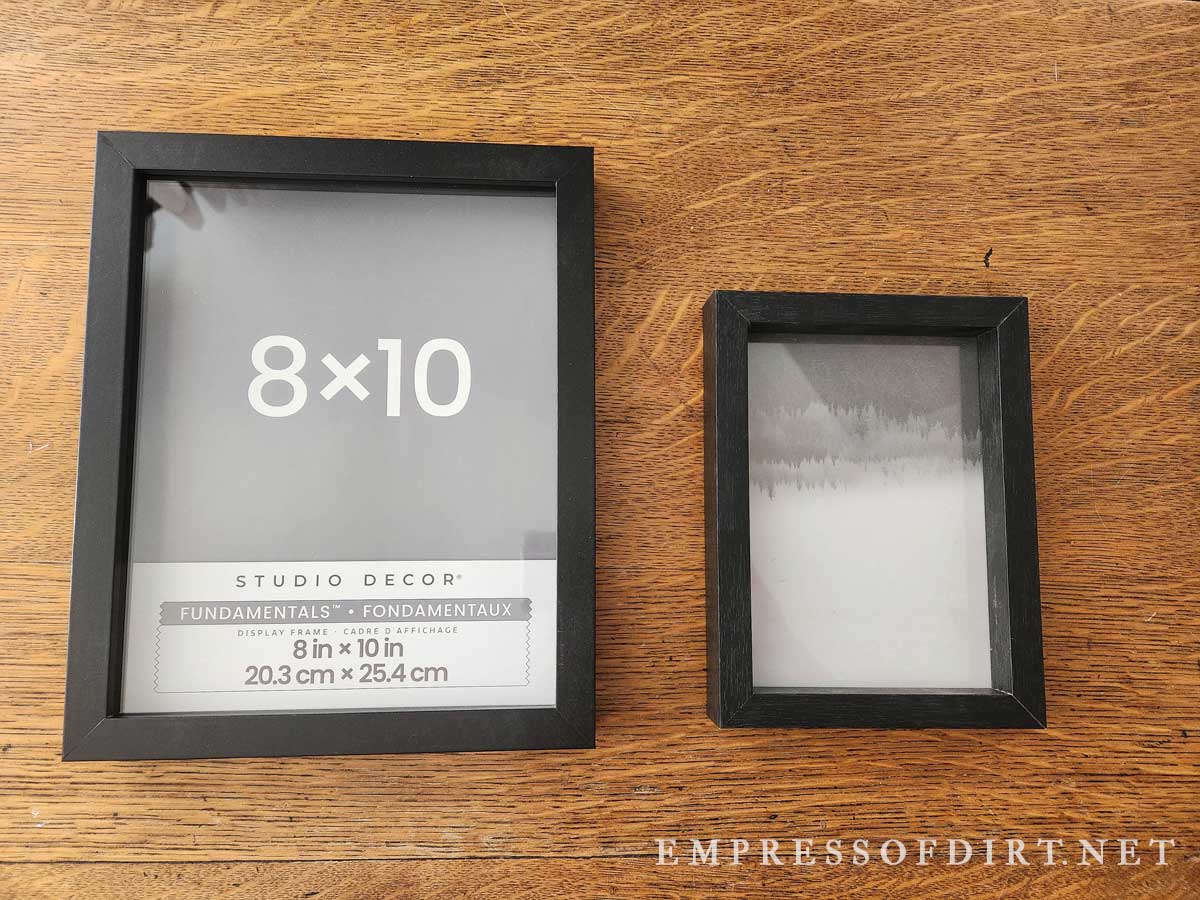
- Shadow box (8 x 10-inch)
- (8 x 10-inch) garden photo for background
- Photo of hummingbird on white background
- Reindeer moss
- Wood branch slices
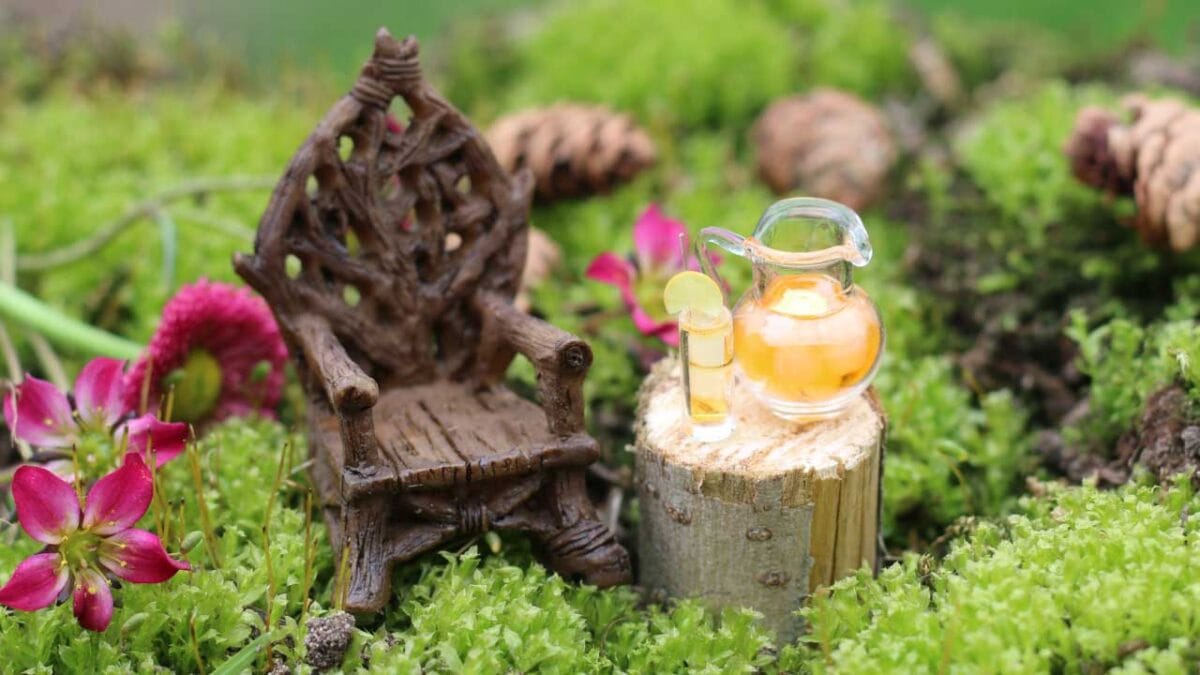
- Miniatures: fox, toadstool, lemonade jug and glass, blue bird, garden hoe, clay pot with potted plant.
Sources for miniatures include dollar stores, craft shops, dollhouse miniature shops, or make your own using polymer clay.
Check Sizes
Make sure any miniatures or other keepsake items you choose will fit inside the shadow box between the background image and the front glass. The shadow box I used allowed approximately 1-inch total depth so I had to cut some of the wood slices to fit.
More Keepsake Ideas
- Empty seed packets.
- Small dried, pressed flowers, seed pods, twigs, leaves, moss (avoid anything that will mold or rot).
- Garden tour tickets.
- Handwritten quotes.
- Miniatures: tools, outdoor furniture, signs, garden art, pond, wildlife.
- Garden journal notes: diagram of vegetable garden layout, list of favorite flowering plants, meaningful or funny tips or expressions.
Theme Idea
Take photos of your garden from the same location at different times of year and create a shadow box for each season.
You could also add mini battery-operated string lights for extra sparkle.
Tools


- Craft knife (if cutting out photos)
- Adhesive foam dots (I used them to make the hummingbird image stand out)
- Hot glue dispenser and glue
- Scissors
- Tweezers
- Towel (to cover table if you’re worried about breaking glass while you’re working)
Plan Your Design

Do a dress rehearsal first to make sure everything will fit. I took the glass out while I tested mine to avoid getting marks on the glass.
Assembly


Get all your supplies ready and warm up the hot glue dispenser.
- Remove the back from your shadow box (where the background photo will go).
- Keep the front glass and frame pieces together while you work.
- I kept the shadow box upright while I worked.
- Remember to check everything from the final viewpoint (the front of the shadow box) as you go.
- Use hot glue to secure items in place. Because hot glue is visible when dry, apply it strategically so it remains hidden.
- Work from the “ground” up.
I started by adding the mini wood slices and reindeer moss along the inside base of the shadow box.
I secured the lemonade jug and glass to a thin wood slice and then glued that to the wood “table.”
The fox, bird, hoe, clay pot and potted plant were also secured with dabs of glue.


- The hummingbird was cut out from a photo print on a white background. I intentionally chose this size (bigger than it would be in the background photo) so it would it stand out.
It’s mounted on top of the background photo using three foam dots. These dots have adhesive on both sides and work nicely for adding a 3D look to flat items. - When everything is in place, double check that you like the arrangement. Doing any tweaks needed and then secure the background image in place.

I hope you’ll try making your own!
I’m going to create a winter version as soon as I’ve collected the miniatures I want to include.
Resources
More Projects & Ideas
- Beginner’s Guide to Polymer Clay (Make Your Own Miniatures)
- How to Make a Fairy Garden in an Old Suitcase
- How to Press Flowers—Fast & Traditional Methods
~Melissa the Empress of Dirt ♛
Special Offer

Empress of Dirt
Garden Goodies Digital Bundle
8 Ebooks & Printable Garden Planner & More
by Melissa J. Will
All Empress of Dirt fan-favorite garden-related digital products together—at last!
PayPal, Credit Card, Apple Pay
These are digital files (PDF format) you save to your device. It is not a physical product.