These instructions show how hypertufa garden containers can be made with molds or free-form using cement and natural fillers. Use the basic recipe and follow the tutorials to create an assortment of garden planters and art.
If you love creative containers, also see 40 Unique Container Gardening Ideas.

Getting Started with Hypertufa

Hypertufa Recipe | Project Tutorials
Video Tutorials
Hypertufa pots were developed specifically for alpine plants but they make excellent containers for annuals as well.
Made from cement (and other ingredients), the finished product is naturally porous (allowing some slow drainage) and lends itself to all sorts of artistic ideas.

To get started, create hypertufa pots using molds. These can be cardboard boxes, large plastic bowls, or smaller items like ice-cream or milk cartons.
I have listed a whole bunch of ideas for hypertufa molds here.

One excellent feature is, while the hypertufa mixture is curing (setting up or drying), there’s a window of opportunity where you can adjust the shape of the planter and create any additional drainage holes needed.

Be sure to get a copy of the free tip sheet if you would like to save this information for later.

Contents
What is Hypertufa?

The word originates from hyper + tufa and describes a homemade tufa substitute.
Tufa is porous limestone formed from calcium carbonate. Years ago it was a popular material for making garden troughs and containers but is not practical for DIY gardeners.
The term hypertufa was coined when gardeners started making their own tufa substitute in the 1930s.
This helps understand the key components:
- Cement is the main ingredient in both concrete and hypertufa pots.
Cement is made of various calcined (heated) mixtures of clay and limestone. - Portland cement is the most common type of cement used in concrete, mortar, stucco, and grout.
- Concrete is a stone-like material made by mixing cement and various aggregates (sand, pebbles, gravel, shells, slate, or shale) with water and allowing the mixture to harden.
- Hypertufa is made by combining various aggregates (sphagnum moss, sand, perlite, vermiculite) with Portland cement.
Planters made from hypertufa have a rough and rustic appearance. Concrete pots are smoother with a more uniform appearance.
In other words, you can make both concrete and hypertufa with cement as the main ingredient.
Can I use Quikrete for hypertufa planters?
No, do not use any fast-setting or instant concrete products. These already contain aggregates like sand and gravel and will not set and cure properly if more are added.
Use pure Portland cement and follow the recipe below.
Hypertufa Recipe
What are the ingredients in hypertufa?
This is a basic recipe for making hypertufa pots, planters, and stepping stones.
- 1-part Portland Cement
- 1-part Sand or Perlite or Vermiculite (or a combination)
- 1-part Peat moss (see note) or Coconut coir (chopped up)
- Water
To measure your ingredients, use some sort of large jug or bucket and use equal parts of each. The water is added gradually, with lots of stirring until the desired consistency is reached. I have listed tutorials below with more instruction.
Can I make hypertufa without peat moss?
You can substitute with coconut coir but the end result will not be exactly the same. Peat moss in hypertufa is faster to disintegrate. Coir appears ‘hairy’ and is much slower to decompose.
Peat Moss
Peat (Sphagnum peat moss) has been widely used in potting mixes for years. Extracting peat requires the destruction of irreplaceable carbon-sequestering ecosystems (bogs). Coconut coir is often suggested but it too has limitations with its carbon footprint. Hence, the quest for a sustainable alternative continues.
Supplies & Materials
What do I need to make hypertufa planters?
This is a messy, outdoor project. I strongly suggest gathering enough supplies (containers for molds) so that you can use up everything in one afternoon.
For most people this is probably a good one-time project and you don’t really want half a bag of cement hanging around your storage room for years to come.

- Portland cement . Do not use Quikrete or other products that already contain aggregates.
- Peat moss is the traditional material. Substitute coir (the outer husk of coconut) if you can’t find a sustainable option.
- Sand, Perlite, and/or Vermiculite
- Dust mask.- do not inhale the dust when mixing cement
- Heavy-duty rubber gloves (cement is corrosive — do not touch!).
- Stir sticks (old pieces of pipe).
- Cooking spray (to lubricate containers).
- Large garbage bags or sheets of plastic (to wrap planters while curing).
- Wheelbarrow or large tub for mixing (something you don’t mind getting messy).
- Water bucket (and access to water).
- Small shovel or strong trowel.
- Work clothes & shoes you can mess up / work apron.

Frequently-Asked Questions
How long does it take to make hypertufa?
Techniques and recipes vary quite a bit (depending on the desired look of the pots) but, overall, here’s what to expect. Most of the time is waiting time.
- Day 1
You will spend an afternoon creating your pots (mixing the hypertufa and shaping it into molds). Next there is a waiting period to allow the hypertufa to partially cure. - Day 2 or 3 (depending on the instructions)
A day or two later, the pots are removed from the molds and you have the opportunity to make some adjustments or ‘texturize’ (rough up or smoothen surfaces) and add drainage holes. - Day 14
Pots should be quite firm by now and ready for daily hosing with water or vinegar rinses to reduce the alkalinity of the cement. - Day 21
By this time the pots should be complete cured (hardened). If you love the old-growth look, you can add a moss milkshake (moss plus yogurt or buttermilk blended together) to the exterior for a weathered look.
How strong is hypertufa? How long does it last?
- If you mix your ingredients properly, once hypertufa has dried and cured, it will last indefinitely.
- If you dropped a hypertufa pot from ten feet up onto a hard surface, it could break into large chunks, depending on the composition of the materials.
- Cement and concrete are porous and are not recommended for holding water. There are skim coat products available for lining pots like this to make them watertight.
- You also do not want a hypertufa pot to fill with water and freeze because that could crack it open.
- Placing your pots on small supports (bricks, stones) off the ground can also help prevent water build up.
Where can I get hypertufa molds?
Part of the art of hypertufa is finding unique items to use as molds. I have seen latex molds for sale that could be used for smaller creations. It is much more affordable to repurpose supplies found at thrift shops and yard sales.

The easiest molds are plastic, strong enough to support the weight of the hypertufa, and shaped with the top lip wider than the base for easy release when the project is done. You can also use wood or woven baskets. Adding texture to the appearance is a whole other realm to explore as you get comfortable with it.
Always choose items that you won’t mind having to break open or destroy. Sometimes the project will release from the mold, other times the mold has to be broken or burned to set it free.
If you opt to use two containers to form a mold—an outer and inner container—be sure your inner container is small enough to allow at least a 2-inches gap for the hypertufa itself.
Also, don’t go so big with your project that you can’t physically lift it.
The mold may consist of a few things:
- Outer container for main shape and external texture.
- Smaller Inner container (optional) to form inside shape. You can also use plastic film / cling wrap to line the inside instead of a inner container and shape it manually.
- Plastic film / cling wrap or other non-stick agent like cooking spray, vegetable oil, or grease, lining container to enable cured hypertufa to release from mold.
- Pedestal foot form (optional) for more ornate creations.
Container Ideas
Choose anything with the top wider than the base and avoid 90-degree sides that make it impossible for the project to slide out.
- Plastic bowls, buckets, planters, hanging baskets, window boxes, ice cream tubs, recycling bin, food storage containers, camping coolers, dish pans.
- Wood salad bowl, boxes, dresser drawers. Or build your own shape from scrap lumber.
- Wicker or Woven baskets.
Some projects use glass lamp covers (where you smash the glass when done). Personally, I’m always hesitant to create more garbage waste like this.
Metal is generally not recommended because, if the cured hypertufa will not release, it can be nearly impossible to remove the metal.
The easiest option is to use the ground as mold: dig a hole in the soil in the desired shape, line it with a large piece of plastic film, and pour your hypertufa in place. Just be sure you can lift it out when done.
Resources
DIY Projects with Hypertufa
Written Tutorials with Images
Kim has dedicated her entire website, The Hypertufa Gardener, to all things hypertufa.
Stephanie of Garden Therapy has two tutorials for both concrete and hypertufa planters.
Susan of Learning and Yearning has step-by-step instructions for a giant leaf hypertufa birdbath.
Video Tutorials

This video is a bit older (older video quality) but has a good walk through of the process.
Creative Sculpture Idea
This video shows how this garden art snail was created using a homemade wire form and hypertufa.

Free Tip Sheet
Empress of Dirt
FREE TIP SHEET
DIY Hypertufa Tips
Includes the materials list and basic instructions from this article.
The download link will be sent to your email.
Joining our free newsletter list is optional at checkout.
I hope this gives you some help to get started. You could make a good number of pots you could make a good number of pots!
~Melissa the Empress of Dirt ♛

Hypertufa Mix for Planters
Equipment
- Stir sticks (old pipe or thick wood)
- Cooking Spray
- Plastic Sheets or garbage bags
- Work clothes / craft apron / old shoes
- Wood molds or plastic pots for shaping hypertufa
Supplies & Materials
- 1 part Portland cement Do NOT use Quickcrete or any fast setting mix
- 1 part Peat Moss or Coconut Coir chopped
- 1 part Sand or Perlite or Vermiculite any combination

Instructions
- These instructions are general. Use a specific tutorial for the type of planter you want to make.
- Decide what you want to make an get appropriate molds or containers for shaping hypertufa.
- Set up work area. This is messy. Wear old clothes, protect all surfaces with plastic sheeting.
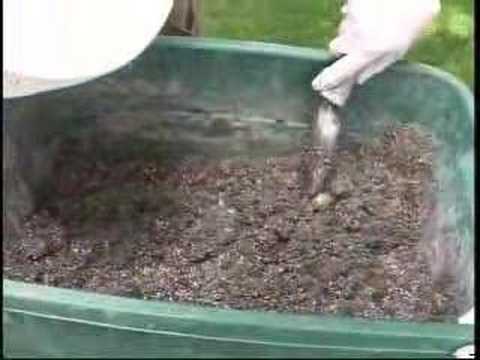
- In wheelbarrow or large bucket, thoroughly combine equal parts Portland cement, peat moss or coconut coir, and sand (or perlite or vermiculite).
- Gradually add water, mixing constantly, until completely combined and consistency of fudge.
- Add hypertufa mixture to molds and allow to cure for 1-2 days per tutorial you are following.
- Day 2 or 3: Remove from molds and add drainage holes and adjust surface as desired.
- Allow to cure for two weeks.
- Day 14: Rinse with vinegar to reduce alkalinity of cement.
- Day 21: Ready to use.
Erin Baker says
I am at day four and took the pots out of their molds. They are very fragile. I am not sure how you are supposed to be able to manipulate them at this point. Also, when do you wrap them I. Bags? The tutorial isn’t clear. Thank you
Melissa J. Will says
Hi Erin,
It takes 2 to 3 weeks for the pots to be firm (see Frequently Asked Questions section). Each person has different approaches but I wait that long. Bags are used to protect them while curing — just to keep rain and debris off.
Claire Daniel says
Wonderful info.
Kathy says
I’m tying to figure out how much of each ingredient to purchase to begin making some hypertufa pots. Suggestions. Also, how do you gauge how much to actually stir up to make a pot…I know it must go on the size of the project but is there some way to know how much to stir up for a certain size project?
Melissa J. Will says
Hi Kathy,
For supply shopping, use the Portland Cement as your guide: there is a standard bag size. Then choose similar volumes of the other ingredients.
As for exact amounts for each project, as you noted, it all depends on the molds you are using. You can measure the volume with water first to get a sense of how much hypertufa mixture you’ll need. Keep notes while you work and you’ll soon have your own custom recipes.
susan brooks says
I am interested in the leaf stepping stones. Folks here have made them with a vinyl patch cement mix for a smoother finish.
My concern here is if walking of a path made this way is walkable? Can you really step on them??
Perhaps there is another recipe which would make the leaves walkable?
Let me know!
Melissa J. Will says
The ones here are (to me) more decorative than functional. I see them used in parts of a garden bed where one would only walk occassionally. If it looks leaf-like, I can’t imagine it would ever be pleasant to walk on because it won’t be flat. There are so many recipes online you’ll likely find something that suits your needs.