Use these free instructions to sew your own fabric grow bags in any size (small, medium, large, and extra large) for your patio, balcony, or garden. Lightweight, inexpensive, and compact to store, they are a smart alternative to bulky plastic pots.
If you enjoy sewing, this garden apron pattern is easy to make and great for protecting your clothes while working in the garden or greenhouse.
Make Grow Bags for Your Garden

Grow bags have become popular in recent years because they solve several garden problems. Made from lightweight, durable fabric, they cost very little to make and fold up nice and small for easy storage.
Grow bags can be used for annuals including flowers and vegetables or perennials you plan to overwinter in a protected storage area. I use mine for food crops like salad greens, herbs, carrots, tomatoes, and placing annual flowers around the garden.
Because the sides of the grow bag can roll down, you can set the bag to whatever depth you want, using just the amount of potting mix needed.
Small and medium grow bags can also be hung on fences, gates, or the side of raised beds for decoration or to maximize growing space.
At the end of the season, grow bags can be emptied and folded up, using minimal storage space.
See the Resources section to get a copy of these instructions.

How do you make fabric grow bags?
To make grow bags, landscape fabric is sown together to form a round container. Adding handles is optional. Once you add potting mix, the bag holds its shape.
The sewing instructions here are universal: the steps work no matter what size bag you want to make. It’s all straight stitching and perfect for beginner sewers. I’ve also included video instructions here.
I’ve provided some sample size suggestions from mini (for young plants) to extra large (similar to the capacity of a half whiskey barrel) to get you started.
New to Sewing?
Make a mini or small bag first to test out the pattern. Once you see how they’re made, it’s easy to whip up a bunch of them.
Pros and Cons of Grow Bags
Landscape fabric is sold in rolls and really inexpensive for a project like this. You can find it in home improvement stores in the garden section.

It comes in various strengths listed by the number of years it is supposed to suppress weeds (3,7, or 20 years). I do not like it for the intended use (it ends up being a nightmare in the garden), but it is affordable and works nicely for sewing these bags.
Made from BPA-free polypropylene—the same plastic used to make yogurt containers—the non-woven fabric is very lightweight and breathable. The specs say there is ‘no meaningful chemical exchange with the surrounding environment’, so I use them for all my plants including food crops.
With greater air circulation, your plant roots in grow bags will naturally ‘air prune’ instead of overgrowing or circling around the way they can in plastic pots.
Because the fabric is so lightweight, the extra large size weighs less than half a pound (5 ounces!) and folds down to the size of shoe, which is super handy if winter storage is limited.
Do fabric grow bags need drainage holes?
Grow bags do not need drainage holes because they are porous and water gradually seeps out. The downside is they do not retain moisture as efficiently as plastic pots.
I compared single and double-ply grow bags while testing out various sewing designs and a double-thickness is definitely better both for added strength and holding moisture longer so I’ve designed the pattern (below) using two layers.
You may want to sit the bags on saucers if using them on a patio or balcony where you don’t want any water dripping out. Or, add extra fabric to the bottom of the bag before planting. I don’t find this a problem unless I seriously over-water the bag.
If you live in a really hot climate and will be placing your grow bags in direct sun, you may want to make them 3 or 4-ply to further slow water evaporation.

Watch Video Instructions
Watch this video first to get a good overview of the process.
You can also view this video on YouTube: How To Sew Grow Bags

How to Sew Fabric Grow Bags

Materials
- Landscape fabric – 3-foot x 50-foot roll
Be sure you’re getting a product made of polypropylene.
I used a double layer of 7-year landscape fabric for each grow bag. Label may say somewhere between 2 to 3 oz weight. Any thicker and it may be hard on your sewing machine.
This may also be marketed as weed barrier fabric.
The link goes to Amazon but just get it at a local home improvement store for the best price. - Outdoor thread – Coats or Guterman heavy duty polyester UV resistant (black).
- Webbing (optional) 1″-wide for handles.
For best value/price, look for webbing by the yard at a fabric store, not in pre-cut lengths. Two handles on a medium bag requires 1-yard of webbing.
You may also find webbing at thrift shops: look for old purses and shoulder bags made with long lengths of it.
Sample Costs
Medium Grow Bag
(12-inch diameter, 12-inches tall)
Total Cost: $2.07 CAD/ $1.54 US
Here are the calculations:
- $8.00 CAD for a 50-foot roll (3-feet wide) landscape fabric. That’s just 16 cents per foot (48 cents per yard).
A medium grow bags uses 1 yards of landscape fabric. - $1.39/yard webbing – This is the most expensive item.
A medium grow bag needs 1 yard of webbing ($1.39), a large one needs 2 yards ($2.78). - $6.49 (328 yards) Thread (Guterman heavy duty polyester UV resistant black) or just under 2 cents per yard.
A medium grow bag uses approximately 10 yards (including bobbin) = 20 cents. Maybe a bit more.
Equipment
- Sewing machine
- Ruler
- Straight pins or clips
- Scissors
- Denim sewing machine needles
- White pencil crayon or sewing pencil or paint pen
Before You Start
Square Fabric Pieces versus Rectangular
The diagrams below show square pieces of fabric.
The sewing instructions are the same whether you start with square or rectangular fabric pieces but (spoiler alert) SQUARE IS BEST.
Square pieces give you a round(ish) grow bag that keep their shape when filled with soil.
Rectangular bags don’t keep their shape (they get floppy).
Adjustable Height | Your finished grow bag can always be folded down to a lower height as desired so one size suits many different types of plants.
No Ironing | Because landscape fabric is made from a polypropylene (a plastic), we will not be ironing it as you would other fabric sewing projects. To smooth things out, just finger press seams if needed.
Seam allowances can be ¼-inch or ½-inch. Just be consistent, whatever you choose.
1Cut Fabric Pieces
Cut four pieces of landscape fabric all the same size.
I don’t worry about a ‘right’ or ‘wrong’ side to the fabric as they look really similar.

Suggested Sizes
These sizes are approximate because it depends on your seam allowances and how you choose to finish the bag (bottom corner seams and top lip). More is explained below.
- Mini | Cut (4) pieces of landscape fabric 9-inches x 9-inches
Final size approximately 6-inch diameter, 8-inches tall - Small | Cut (4) pieces of landscape fabric 12-inches x 12-inches
Final size approximately 8-inch diameter, 10-inches tall - Medium | Cut (4) 18-inches x 18-inches
Final size approximately 12-inch diameter, 12-inches tall - Large | Cut (4) 27-inches x 36-inches
Final size approximately 17x8x18-inches tall - Extra Large | Cut (4) 36-inches x 36-inches
Final size approximately 20x14x20-inches tall

2Pin and Sew Side A

Start with SIDE A. Pin all four layers of fabric together and sew seam.
You can use ¼-inch or ½-inch seams—just be consistent.
Prefer visual instructions? The step-by-step instructional video is here.

3Pin and Sew Side B
Press fabric out nice and flat with hands, then pin and sew seam for SIDE B.

Now all 4 pieces of fabric are attached together with a seam on either side.
Check your bobbin area as you sew: this type of fabric tends to create a lot of fluff that catches down there.
4Turn and Align Seam A and B
Now we are going to rotate everything a quarter turn so that SEAM A is in the middle and SEAM B is directly below it underneath.
Line up seams and secure in place with pins.

It’s fine to either finger press the seam allowances open or to one side: it will turn out fine either way.
With SEAM A and B lined up, pin all 4 layers together and stitch a seam allowance across bottom of bag.
Remove pins.
5Move SEAM A and SEAM B to Sides
Now we are going to move SEAM A back to the left side and SEAM B to the right side.

I do it by pinching SEAM A on top and SEAM B underneath and shifting everything a quarter turn counter clockwise.
In other words, move SEAM A to the left side and SEAM B to the right side (how you had it previously). The next diagram shows the positioning.
Prefer visual instructions? The step-by-step instructional video is here.
6Mark and Sew Two New Bottom Seams
After putting SEAM A and SEAM B back to either side, the bottom will look something like the next diagram.

The points marked C1 and C2 should be placed exactly half way between SEAM A and SEAM B. Temporarily pin C1 in place. It may or may not be near the top of the bag: this varies depending on bag dimensions.
See the other four circles in the diagram?
If you want a round bag, your stitch lines for BOTTOM E and BOTTOM F will start and end at the middle points.
Measure each of those edges and mark the middle (halfway) points.
Draw your sewing lines (BOTTOM E and BOTTOM F) on the fabric, remove the C1 pin, and stitch along those lines.
For a Rectangular(ish) Shaped Bag
I mentioned that round bags made from squares of fabric work better than rectangular, but in case you still want to try it, this is how it’s done.
Instead of marking your stitching lines for BOTTOM E and BOTTOM F at the middle point of each edge, pick a spot closer to C1 and C2 and be sure both seams are the same distance from those points. Stitch both seams.
As mentioned, the rectangular bags don’t keep their shape the way round ones do. You may not mind this: or you may want to insert cardboard along the edges to better define the shape. If unsure, just make round ones.


Prefer visual instructions? The step-by-step instructional video is here.
7Turn Grow Bag Right Side Out
Turn your bag right side out so that the seams are on the inside.
You probably noticed that the Step 6 stitching created two triangles of fabric in the bottom. Do not cut them off. They will help reinforce the base of the bag and retain moisture.
8Finish Top of Grow Bag
To finish the top of the bag, pin and stitch the two layers of fabric together, all the way around the top.
Then, fold the top down (like the cuff of a sock) and stitch in place as desired. How much you fold over is up to you: you may not care if there is any lip, or you may like the look of an inch or two of fabric folded over.
9Add Handles (Optional)
Handles are optional and much more for aesthetics than function since you can just pick up the grow bag without them.
I like adding handles on the medium and large bags or for hanging the small bags on a wall or fence.
They would look silly on the small ones and probably couldn’t hold the weight of the extra-large bags when they are filled with plants and moistened potting mix, and might even tear. But do as you please.
Webbing for Handles (1″-wide)
If your webbing has unfinished ends, hem them first.
- Medium bags – 2 handles – 18-inches each
- Large bags – 4 handles – 26-inches each
Placing Handles
You will sew (top stitch) the handles on the exterior of the bag.
One option is to place one handle at SEAM A and another at SEAM B.
Using the seam as the middle point, pin your webbing in two places, equal distance from the seam and the same distance from top of bag.

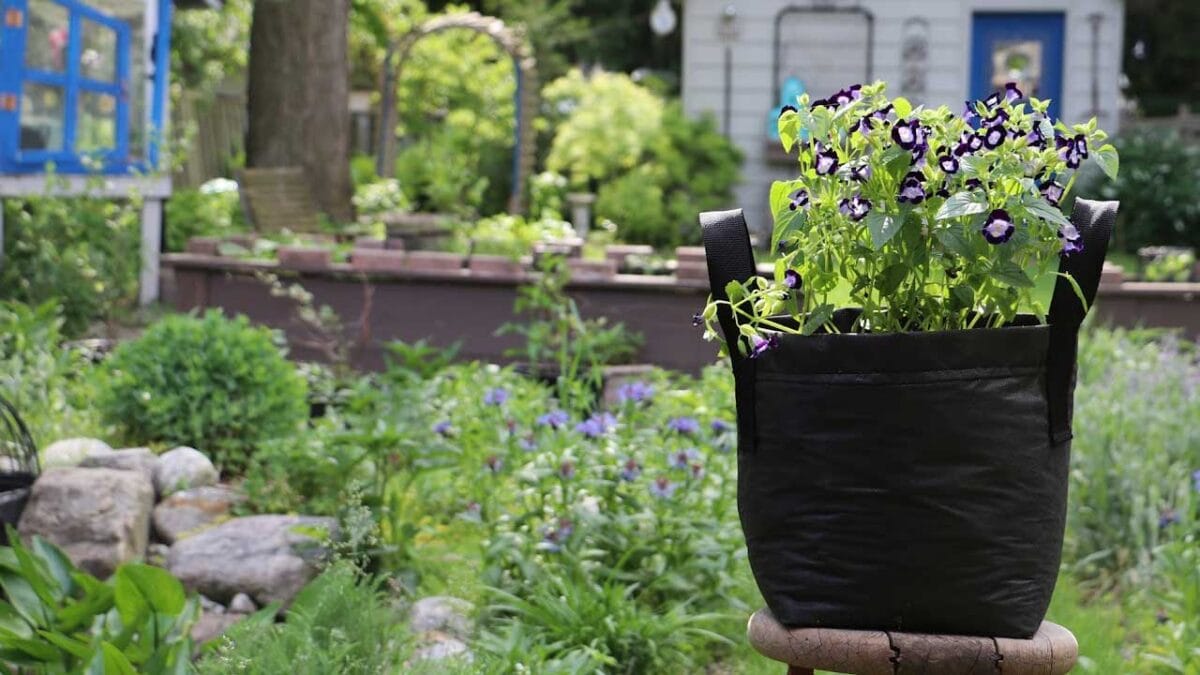
In the photo (above), I’ve got a medium-size grow bag with an 18-inch piece of webbing for the handle. The two ends are placed 3-inches apart (each 1.5 inches from the seam). Four inches of each end of webbing is sewn to the bag. This is repeated on the other side with another 18-inch piece of webbing.
Careful not to twist the handle when pinning it in place.
To attach my webbing, I stitched a rectangle near the inner edges of the webbing and reinforced it with another line of stitching down the middle.
Larger grow bags will be heavy and need extra long lengths of webbing with more of it attached to the bag to avoid tearing.
Depending on the bag size, you may want two or four handles with each piece of webbing approximately 26-inches long, spaced 5 or 6 inches apart from a seam or mid-point, with at least 6-inches attached to the bag.

And that’s it.
Your grow bag is ready to fill with potting mix and plants.
Once you’ve made one, you’ve got to make a bunch!
Resources
How to Sew Grow Bags
Instruction Sheet
File is in PDF format and can be saved to your device and/or printed.
The download link will be sent to your email.
Joining our free newsletter list is optional at checkout.
Ebook

25 Garden Art Projects & Ideas
by Melissa J. Will
Reader’s favorite garden DIY projects and ideas from the Empress of Dirt website.
PayPal, Credit Card, Apple Pay
This ebook is a digital file (PDF format) you save to your device. It is not a physical product.
~Melissa the Empress of Dirt ♛

How to Sew Grow Bags (Easy Pattern, Any Size)
Supplies & Materials
- 1 yard Landscape fabric 7-year quality
- 1 spool Outdoor thread black, UV protection
- 1 yard Webbing black (for two handles-optional)
Instructions
Cut Fabric
- A medium bag uses (4) 18×18-inch pieces and the finished bag is two layers thick.
Pin and Sew Two Sides
- Pin and sew seam on Side A, stitching all 4 layers together.
- Pin and sew seam on Side B, stitching all 4 layers together.
Rotate and Pin
- Rotate one-quarter turn placing Seam A in center and Seam B directly underneath.Pin in place.
- Pin and sew seam across bottom.
Rotate Seams Back and Prepare Bottom
- Shift everything back so Seam A is on left side and Seam B is on right side.
- Align bottom points C1 and C2 with center of top edge.
- Draw and sew seams for Bottom E and Bottom F at middle points of edges.
Turn Bag Right Side Out
- Turn bag right side out and push out corners from inside.
Finish Top Lip
- Pin and sew seam around entire top of bag.Fold lip over (like a sock) an inch or two and stitch in place.
Add Handles (Optional)
- Cut and hem two 18-inch lengths of webbing.Attach ends of webbing on both sides of Seam A and Seam B, positioning them equal distance on either side of each seam and from top edge of bag.
Beryl Haygood says
I’m so happy to know that I can make my own grow bag . Thank you so much for sharing how to make our own grow bag, I like to make my own things.
Thank you again
Beryl Haygood
Foley says
Wonderful instructions. I am a first-time sewer and I was able to complete this no-problem. I’m using canvas instead of landscaping fabric bc I hate plastic, I wonder if you think it would still be necessary to make a 2-ply bag? I might try with just two sheets of canvas and see how that goes.
Melissa J. Will says
Hi Foley, Good job as a first-time sewer! There are many different thicknesses and qualities of canvas so hard to know from a far what would be strong enough. Trust your judgement. Happy sowing!
Terry Williams says
I read grow bag instructions on a few other sites. This is what I was looking for. Very easy to read and construct. I wanted bags with bottoms and handles to be able to move them into sunshine as I live amongst a lot of trees. I did not have webbing but have a nice stash of denim and am making handles with that-per your handle instructions. I just completed the medium size bag and am going to try all sizes since your instructions are super easy to follow. Gonna be a good gardening season here!
Thank you!!
Melissa J. Will says
Thank you, Terry. Glad you found it helpful. Happy gardening!
JANICE A KNIGHT says
Wanted a bigger grow bag than purchased for potatoes, this seems much better/easier/cheaper than wire cages.
Nedra says
Can grow bags be made out of polyester fabric? I have several yards if 1970’s polyester and wonder if this wouldn’t a a good source for a project.
Melissa J. Will says
Hi Nedra,
I’m sure you could make bags but to me the question would be, is this safe to use for the soil and growing food crops? If the fabric has a tag perhaps you can research what’s in it and learn if it’s considered food safe.
Nini says
This is FANTASTIC!
Rachel R says
I am certainly going to try this! Which size would you recommend for tomato plants? I usually grow cherry tomatoes.
Melissa J. Will says
Hi Rachel,
For cherry tomatoes, a 12-inch diameter bag would be the minimum I’d use. The larger, the better.
A larger size means the potting mix can hold more water and the roots have more room to grow. So make it as big as you can manage. I base it on how much potting mix it will require too!
Rachel R says
Thank you!
Sherry Stemper says
These instructions are so clear. I really liked the video as well. I first saw this concept of using grow bags for plants on Amazon. I viewed several sites with instructions on how to construct these bags. Your instructions are the most simple and clear to me thank you so much! I can’t wait to sew some grow bags
Melissa J. Will says
Wow, that’s very nice to hear. Thank you, Sherry! And happy sewing. 🙂
Diane Jennings says
I am going to use my bags to start seeds. Does it matter which side is the outside since they will be on a capillary mat for watering? Do you suggest two layers in this case or would one do?
Melissa J. Will says
Hi Diane,
The side facing out will not matter.
As for layers, I prefer double layers so the potting mix does not dry out too fast.
Jill says
Hello! Thanks for this! Just wondering if you would give permission for me to sell sewn bags from your instructions here? Thanks for the reply.
Melissa J. Will says
Hi Jill,
Great question. Yes, you can do whatever you like with the bags you make including selling them. It’s the instructions, images, and video are copyrighted.
Kathleen Zeile says
I purchased some shopping bag material which does have a right and wrong side. (I will actually be putting purchased grow bags inside the pretty bag). Do you have a thought about using right and wrong sides to sew these? Thanks in advance
Melissa J. Will says
Hi Kathleen,
Not sure if it would matter (re things like waterproof-ness). I’d go with which ever side looks best to you as the outer side.
Donna Wojcik says
Absolutely love this idea! Thank you for the pattern and instructions! What are your recommendations on painting the bags? Do you think the paint chemicals would into the soil? I am a teacher and may be trying these with my students soon.
Melissa J. Will says
Hi Donna,
I have used acrylic paints and have no concerns about the soil. Good luck with your project.