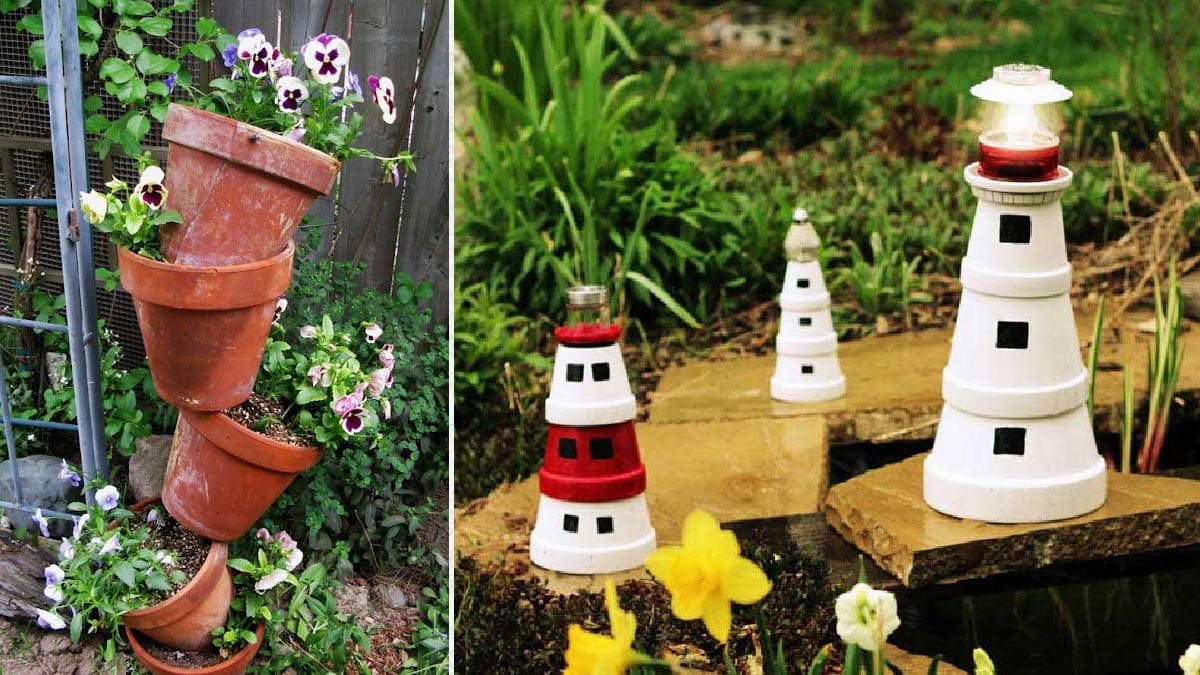
These clay pot lighthouses are an easy craft project to make with kids and can be completed in an afternoon. A solar lamp on top makes them glow at night—it’s very pretty!
If you would like more garden art project ideas, also see Creative Projects to Make with Clay Pots.
DIY Flower Pot Lighthouse

Whether you have a favorite lighthouse you want to commemorate or just love lighthouses in general, this is a fun and easy garden art project.
It’s made from various sizes of terracotta clay pots and craft paint. You could also repurpose slightly damaged or chipped pots.
While you can paint your lighthouses like the ones shown here, you may also want to look at photos of lighthouses from around the world to find more design ideas.
Most lighthouses are white with red and black accents, but there is no reason why you can’t choose other colors.
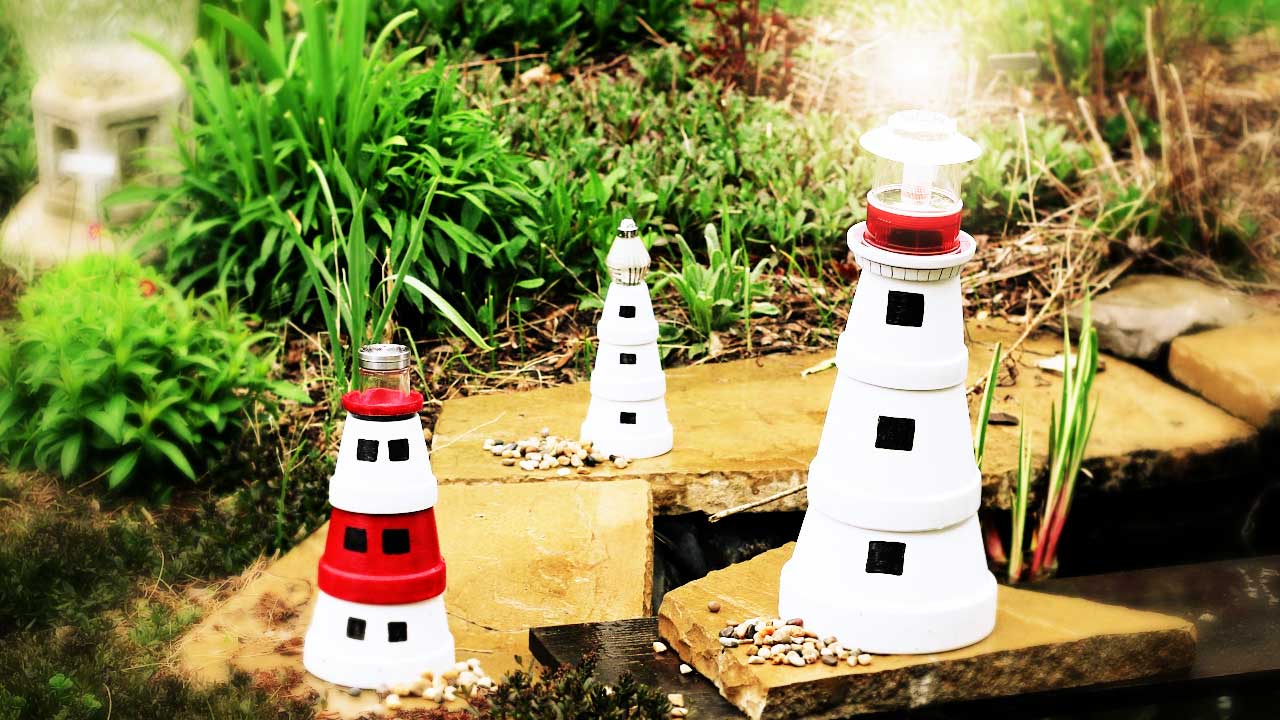
The lighthouse pictured below is basically a white tower with the lamp at the top, a few small windows, and some red trim.

I love the simplicity but you may want something a little more detailed.
The instructions below list recommended supplies and step-by-step instructions. You can save a copy of the instructions in the Resources section.

Get the Free Printable
There’s a free printable with this article.
Go to Resources (below) to get yours.
Instructions

Supplies & Materials
Tips: Wash & Sand Your Pots First
If you’re reusing flower pots, be sure to wash and dry them thoroughly first.
If they have a glaze or shiny coating, you will need to sand it off. This will allow the paint to adhere properly.
1. Clay pots (3 or 4). You will need various sizes ranging from small to large (one of each size). They will be stacked upside-down to form the lighthouse.
2. Clay saucer (1). This is used as the top deck that the lamp sits on. I used a saucer that fit one of the smallest pots.
3. Lamp (1). You could use a small solar patio light, battery-operated lantern, or a votive candle (for supervised patio use). Whatever you choose, be sure it is the right size to fit on top of your lighthouse.
For my smallest lighthouse, I used an old salt shaker instead of a lamp.
4. All-purpose primer. This makes the paint adhere better to the pots.
5. Outdoor patio craft paints You can see the ones I use here on Amazon.com. I used black, red, and white.
6. Adhesive to glue the pots together. I use GE Silicone II outdoor, waterproof clear-drying sealant. You could also use a product like E6800.
7. Polyurethane or equivalent sealant (to protect the paint).
8. Paint brushes, rags, gloves, clean up supplies.
9. Pencil
10. Paint Pen (black-optional) for adding decorative details.

Lamp Choices
As mentioned in the supply list, if you want the lighthouse to really light up, you could use patio solar light units, a battery-operated lamp, or a solar votive candle.

Alternately, if you don’t want a working light, use an old salt shaker or something similar for the spotlight. You might just have the perfect item sitting in your cupboard.
Steps
1Do a Test Assembly
Before You Paint

Be sure to do a dry assembly of your lighthouse first to make sure everything fits nicely. Also, keep track of the pieces so you know what’s what.
See how the flower pots overlap, one partially on top of the next, in the photo below? Mark those spots with a few small pencil lines. You won’t need to paint the hidden areas.
2Paint the Pots
For long-lasting results, use an exterior primer and paint all-in-one for the base coat. If your primer is white, no need to paint over it with white craft paint.
As mentioned, it’s optional whether you want to paint the hidden areas or inside the pots.
For design details, you could copy what I’ve done here, come up with your design, or look online for inspiration. I kept mine really simple.
3Paint the Windows
EEK! Ghosts! Okay, not really.

When the paint is dry, set up your lighthouse to decide the best placement of the windows (and a door if you want to add one).
I made window templates out of cardstock, traced the shape onto the pots, and painted them black.
Paint pens are perfect for adding any fine details.
4Glue Everything Together
The final step is to attach everything together with adhesive. You’ll want to be sure the pots stay snug together, plus the saucer should be secure on top, holding the lamp in place.
Start with the bottom pot and work your way up.
See the product label for recommended drying time for the adhesive.
Optional Lamp
If you’re using a lamp that requires batteries, don’t glue it on or it will be tricky to change the batteries.
5Add a Protective Coat

Finally, add a few coats of polyurethane (or an equivalent protective product) to the painted surfaces. Follow the directions on the product label and allow everything to dry thoroughly between coats.
Now your lighthouse is ready to be displayed. It looks really pretty when several of them are lighting up the evening garden.
It’s a fun project to complete in an afternoon.

Resources
Empress of Dirt
FREE TIP SHEET
DIY Garden Art Lighthouse
Includes the materials list and basic instructions from this article.
The download link will be sent to your email.
Joining our free newsletter list is optional at checkout.
This project is included in this ebook:
Ebook

25 Garden Art Projects & Ideas
by Melissa J. Will
Grab the top garden art DIY projects and tips from Empress of Dirt
About This Ebook | Visit Ebook Shop
This ebook is a digital file (PDF format) you save to your device. It is not a physical product.
PayPal, Credit Card, Apple Pay
More Ideas for Kids
35 Playful & Practical Garden Ideas for Kids
Sow, grow, garden art & crafts, and outdoor imaginary play.
And don’t forget to sign up for the free Empress of Dirt newsletter for more creative garden ideas.
~Melissa the Empress of Dirt ♛