Can you grow a peach tree from a store-bought pit? Yes! Learn the easy way to grow peaches, plums, and cherries with this stone fruit propagation guide.
You may also enjoy How to Grow An Apple Tree From Seed for more propagation tips.
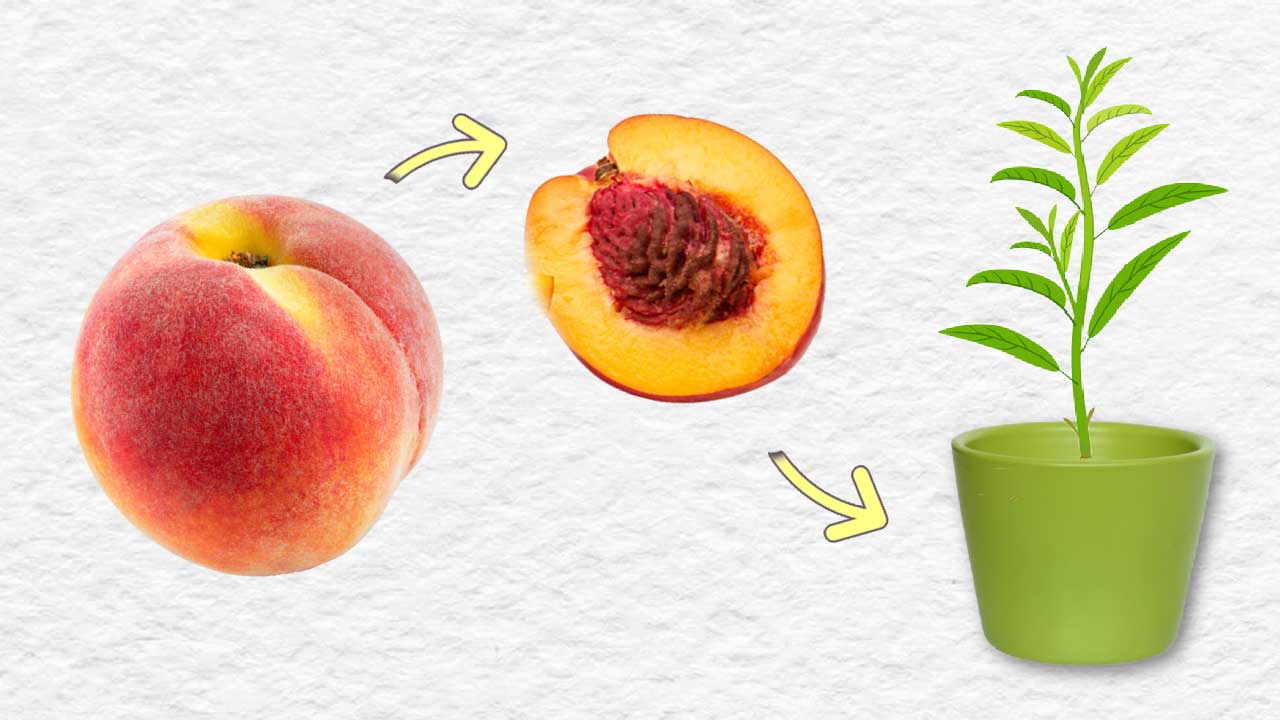
Grow a Peach Tree From Seed

Yes, you can grow a fruit tree from seed but there are a few things to know first.
The steps for growing a tree from the seed (also called ‘pit‘ or ‘stone‘) found inside favorite cold-hardy fruits like peaches, plums, cherries, and nectarines are basically the same. The only thing that varies is how long they will each take to sprout. I’ve listed the estimated times below.
If you think about how this occurs naturally in a cold climate, propagation (growing a new plant) starts when the tree drops its ripe fruit at the end of the growing season. The fleshy part gradually decomposes, exposing the pit inside. Or an animal eats the fruit and eliminates (poops out) the seed. Either way, the you end up with a pit on the ground.
While the fruit is growing, each pit or seed is safely encased in a protective coat or shell. The characteristics of the coat vary depending on the type of fruit but they all serve the same purpose: to keep the seed dormant (stopping it from sprouting) until the embryo matures and readies for germination.
Once the fruit is edible, the pit should be ready too.
Once I became obsessed with germinating all sorts of fruits and vegetables from the supermarket, I really started noticing how much the pits vary. And how many fruits we buy seem to be pit-free or have a partially formed pit due to modern plant propagation and breeding. Those fruits are fine for eating but for propagation (growing new plants), we need a fully formed pit. You can see examples in the photos below.
Timing
Most stone fruits
need 3 to 4 months to stratify
at temperatures between 34 to 40°F (1 to 4°C)
Stone fruit pits can sprout when they are mature and conditions are right.
This will require both stratification and scarification. And don’t worry. These are easy to mimic right in your kitchen.
- Stratification is a period of cold, damp conditions that some seeds require to break their embryonic dormancy phase.
- Scarification is cutting, scratching, or otherwise softening the seed coat / shell / wall to hasten germination.
I’ll show you how to do this using your kitchen refrigerator. Once the pit is sufficiently chilled and softened, it’s grow time.
Before You Start
Want a Specific Variety of Fruit?
Since most seeds from fruit will not reproduce true to the parent (because they are hybrids), this type of germination is done mainly for fun and to encourage new gardeners to experiment with what they have. Yes, your peach pit may grow into a peach tree, but not the specific variety you started with. It may be quite similar but there are no guarantees.
Also, beware that some seeds will never germinate at all or may require different conditions than described here. For example, some peach varieties require a much colder stratification period than a fridge can provide.
If you want to grow a specific variety that produces reliable fruit, it is recommended you start with a grafted tree instead of growing from seed. I’ve written more about this topic in How to Grow An Apple Tree From Seed.
If you want to try this propagating stone fruits from pits, keep reading.
About Plant Patents
Some plants are patented and asexual reproduction is not permitted without permission from the patent holder. Patents and trademarks are usually listed on plant tags.
Steps
Start With Ripe Fruit

Start with ripe fruit that contains a pit. If the fruit is ready to eat, the seeds should be ready for the next step.
Overview
We’re going to remove the pit from the fruit, clean it up, and place it in moist paper towel in a container in the fridge for the required amount of time.
In this example I’m using a plum and a peach.
Remove and Clean Off the Pits
Remove the pit (seed with a protective coat) from each piece of fruit.
Keep in mind that even if you provide perfect conditions, not every seed will germinate. Some varieties are very stubborn and a certain percentage of seeds always fail. So, start a bunch from several different fruits to increase your odds.

The pits will be covered in stringy, pulpy stuff that we will need to remove.
I hold the pits under running water and use a nail brush to gently remove the unwanted stuff.
It does not have to be perfect.
Optional
If you like to experiment and have several pits, you might want to try sprouting some seeds with their coats on and others with their coats removed or cracked open. Ultimately I’ve not found an advantage to removing the coat prior to stratification but neither have I tested every possibility.
If you do want to remove the seed coat first, you can try soaking the pit in warm water for a few days and then removing it with a nutcracker or placing it in a vice and squeezing until it pops open. Take care to avoid causing any damage to the tender seed inside or it may not sprout.

Now is the time to create tags or labels for each type of fruit unless you are confident you’ll recognize them later.
Here is a close up of the peach pit:

And this is the plum pit:

Wrap Each Pit in Moist Paper Towel
Wrap paper towel (or a dish cloth) around each pit and moisten with water. You want it fairly moist without being dripping wet.
Some gardeners like to do this step with potting mix instead of towels where the pit is planted right in moistened potting mix. I prefer the paper towel method so I can easily check on the seed later.

I place everything in a food storage container with a lid but a Ziplock food bag works fine too. There is more on this below.
Label and Place in Back of Fridge
Stratification Period | Temperature
This information is generalized: if you know the variety you’re starting with, do a search to check if more specific propagation tips are available.
| Apricot (Prunus armeniaca) | 100 days | 32 to 45°F (0 to 7°C) |
| Sour Cherry (Prunus cerasus) | 90 to 150 days | 31 to 32°F (-.5 to 0°C) |
| Plum (Prunus spp.) | 60 to 90 days | 34 to 40°F (1 to 4°C) |
| Peach (Prunus persica) | 98 to 105 days | 32 to 45°F (0 to 7°C) |
| Nectarine (Prunus persica var. nucipersica) | 90 to 120 days | 34 to 40°F (1 to 4°C) |
With everything labelled, place the container in the back of your fridge and set a reminder on your phone to check them weekly.
The seeds (pits) do not need light to sprout: just the moisture from the paper towels and the cold fridge temperature.

Alternate Method
While some gardeners recommend air-drying pits for several weeks first, my personal experience hasn’t shown any success with that method. However, gardening is often about experimentation! If you’re starting a large batch, try both the drying and the direct methods to see which performs better for you.
Check Weekly and Re-Moisten Paper Towel As Needed
Initially you will be checking each week to be sure the paper towel remains moist. The whole process may fail if the pit dries out. It’s that constant exposure to moisture and cold that is gradually working toward germination.
At some point—many weeks along—you may notice the pit begins to crack open and the seed inside may begin to sprout. Yay!

Plant Sprouted Seeds
Once this happens, you can plant it in a pot with organic potting mix. I like to wait until there is at least an inch or two of growth so I’m confident the seedling will survive.
You may also find that, after the expected weeks or months of stratification, your pits are still closed or show few signs of sprouting. If things still seem hopeful, you have a few options. I recommend going ahead and planting them, either as-is or after removing the seed coat and then planting. At worst, they don’t grow: at best, you get a tree.

As a cold hardy plant, you can keep the established tree outdoors year-round in a cold climate.
If you have started it indoors, it can be transitioned to life outdoors as soon as the risk of frost has passed.
You can decide whether you want to keep it in a container (increasing the pot size as needed) or plant it in the ground.
If you do keep it in a container, it should have drainage holes and the root ball must never be allowed to freeze solid.
Frequently Asked Questions
Yes, you can grow a peach pit in the ground but it is recommended to propagate them by hand in controlled conditions using the fridge method to ensure better germination rates.
You can expect it to take many years for a peach tree (or any tree grown from a stone fruit) to grow and mature enough to produce fruit.
Resources
Ebook

Kitchen Propagation Handbook
7 Fruits & Vegetables To Regrow As Houseplants
by Melissa J. Will
Learn how to grow houseplants from avocado, oranges, lemons, ginger, and more using leftover pits, seeds, and roots.
PayPal, Credit Card, Apple Pay
This ebook is a digital file (PDF format) you save to your device. It is not a physical product.
~Melissa the Empress of Dirt ♛

How to Grow a Peach or Plum Tree From Seed (Tutorial)
Supplies & Materials
- 1 Peach ripe, with pit inside
Instructions
- Remove pit from ripe peach.
- Gently scrub pulp from pit until fairly clean and photograph it for reference.
- Place pit in moist (not damp or dry) paper towel (fold around pit) and place in food storage container or bag.
- Label with fruit name and date .
- Keep in fridge for approximately 98 to 105 days. Best temperature for peach pits is 34 to 40°F (1 to 4°C).
- Check pit weekly and re-moisten paper towel as needed.
- When sprouted, sow pit 2-inches deep in flower pot with organic potting mix.
- Continue growing on a sunny window sill until risk of frost has passed. Then gradually introduce plant to outdoor growing conditions—a process known as "hardening off."
Ellie says
That’s an interesting idea that I have been entertaining for few years, so… I am wondering (it’s August 4th, 2024) why bother with stratifying (peach, in my case) seeds at all, when the seed should accomplish the same thing over the Winter time? In my case, the Winter starts around October to the end of May.
If I just plant the peach seeds directly in the ground outside, wouldn’t it work
(if at all, of course)?
Thank you for your time and information 🙂
Melissa J. Will says
Hi Ellie,
Yes, stratifying naturally is fine.
The advantage to managing the process is you can control the conditions and timing and protect the process (from animals and storms etc.). 🙂
Patricia E Keene says
I have been saving peach pits for a while now and will see if I can get them to sprout using this method. It will be a lesson in patience!
Vangie says
I learned a lot, I really don’t understand why people throw away their fruits and vegetables seeds. My vegetables scraps keep my little garden full of certain vegetables all season long. Even if you don’t have any space to grow, this ur seeds out, something or someone will benefit, even the soil, It just seems like such a waste to destroy.
Stephen J Hammond says
I’ve had this thought of how to grow peach trees from pits for so many years and not until this morning when my granddaughter ask the same question. have I ever researched it! this is fascinating! thank you so much! for your lovely website and giving us the road map for growing peach trees!
Melissa J. Will says
What a lovely grandmother you are. I hope you two try growing lots of things! There are tutorials here for more food seeds: apple, avocado, lemon / orange, and more!
Bella Breault says
Good morning, about a month ago, I removed the seed from the pit, placed it in moist paper towel and placed it in a dark room…the seed has now split, but no roots are forming…any advice, please?
Melissa J. Will says
Keep going. It’s most likely the insides are swelling and starting to grow.
Kim Creed says
Giving this a try today!
Jeff says
Can you still do any of these procedures if you left the seed(s) with the protective coat out for a few day and the coat is dry?
Melissa J. Will says
Hi Jeff,
There’s no way of knowing without trying. Might or might not work.
Also, it’s helpful to note that nature has zillions of ways to get seeds to sprout. And there are countless factors that contribute to the success or failure. I encourage a lot experimenting for this reason.
Pennie says
Plan to try. At worst end up with a few more shade trees for our 40 acres! Thank you.
Shawna says
Thank you!