Turn a plain mirror into an optical illusion using these step-by-step instructions. Create your own door to a secret world.
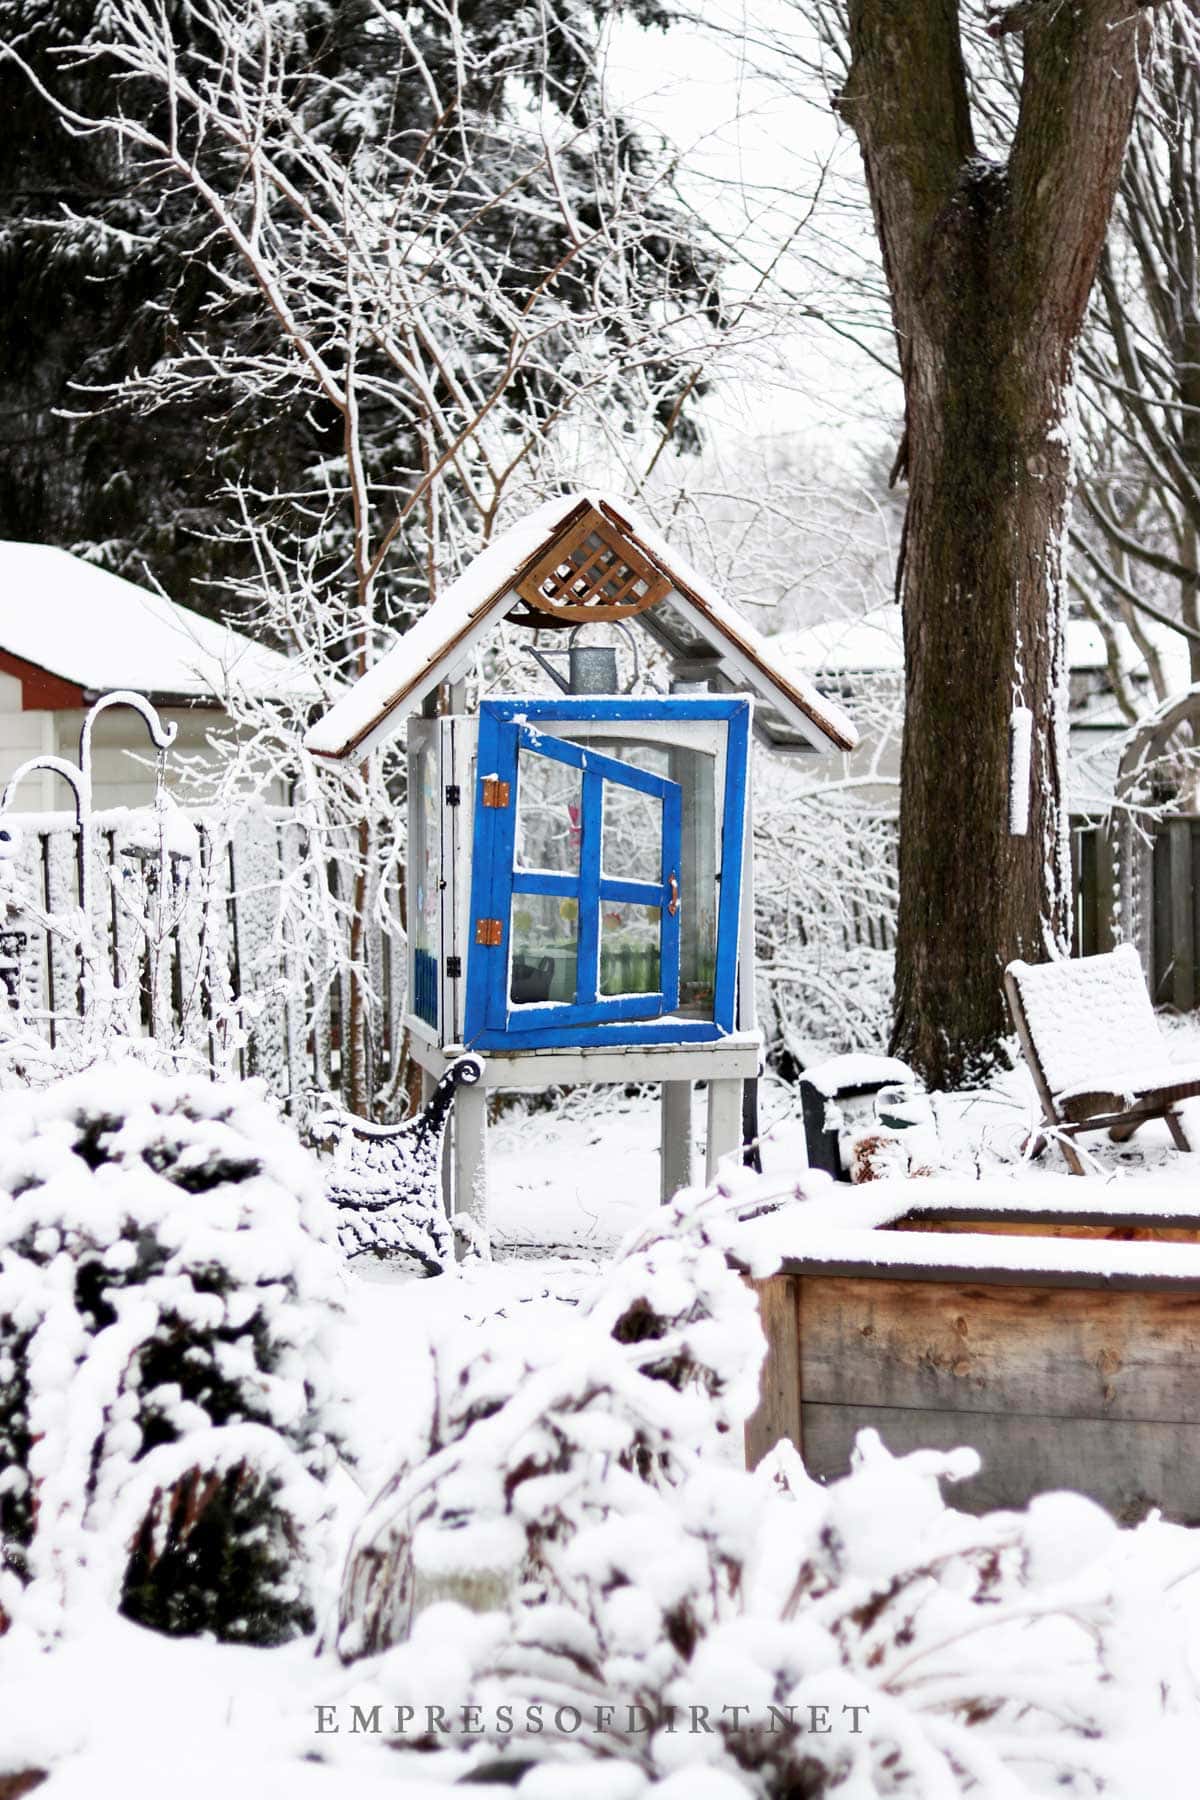
This mirror looks great at the end of a hallway or in a bedroom. If you want to use it outdoors, this has tips on keeping it safe for birds: How to Use Mirrors in the Garden.

DIY Optical Illusion Mirror

I’ve been admiring these mirrors for years and, after seeing one priced at $290, decided I probably could make my own. Nothing like inflated prices to make you feel like you can do it yourself!
As it turns out, it was much easier (and faster) than I expected. In fact, you could probably make your own (other than waiting for the paint to dry) in less time than it will take me to write these instructions.

This project cost me a whopping $12 to make with the purchase of a mirror, wood, and hardware at the thrift store. I used leftover paint from my garden shed makeover.
These next mirrors are photoshopped to show how they would look in various colors.

Contents
- Design Ideas
- Tips For Best Results
- Basic Steps – Overview
- Tools & Materials
- Make a Template
- Cut Wood, Paint, & Assemble
- Resources

Get the Free Printable
There’s a free printable with this article.
Go to Resources (below) to get yours.
Design Ideas
There are so many possibilities for these mirrors but they all have the same basic design.
Look at the images below.
Every mirror has an outer frame and an inner frame, which is the section that creates the illusion.
All of the wood lays flat on the mirror.

Here’s the same design with window grilles:

This next one is simply doubled to look like two open windows:

And here’s another variation made to look like an open garden gate.

This can be really cool mounted on a fence or actual garden gate. Or at the end of a hallway in a home.
To create my optical illusion mirror, I used the design with window grilles but simplified it so there were fewer wood cuts required.

Tips for Best Results
Before we get started with the instructions, here’s a few things to consider:
- Use the same size/thickness of wood for the entire project (unless your mirror already has a nice frame). I used 1×2″ lumber.
- There are many options for joining the wood pieces: this may determine which thickness of wood you choose (if you have some experience or expertise with woodworking). I’ve listed what I used in the materials section below.
- Think about how you will hang the mirror (if it doesn’t already have a frame and hanging hardware) and plan accordingly.
- Paint the inner and outer frames the same color. This seems to enhance the effect of the illusion.
- Paint all sides of the wood including the sides and back since it will be reflected by the mirror.
- Add hardware (hinges and handle) to give the effect of a functioning window or door.
Make a Paper Template
I mentioned this project can be done without any special measurements or calculations and here’s how.
Make a paper version first.
By creating a paper template, you will know exactly how much wood you need, you”ll have a template for each wood cut, and you’ll be able to double check the design before ever cutting the wood.
And, if you can draw it, you can cut it out and make it! It doesn’t have to be like mine. Draw some samples. Experiment. See which one you like best and make it!
I’ll walk you through the steps below to show how to create your design.
Basic Steps-Overview
- Get materials and tools ready (list below).
- Make paper template for the wood cuts.
- Cut wood.
- Test assembly.
- Prime and paint (or stain) all sides of wood.
- Attach hinges and handle.
- Secure mirror to back of frame.
- Attach wood pieces to front of mirror.
- Add hanging hardware.
- Find a safe place to display it indoors or outdoors and amaze your friends.
Tools & Materials
There are so many options depending on your woodworking skills or standards.
I’m a complete amateur but wanted something sturdy that looks good.
- Paper (for creating sample template).
- Mirror (square or rectangular). The one I used is approximately 36×44″.
- Wood (I used 1×2″ lumber) – after making the paper template, you will know how much wood is needed (and what lengths).
- Paintable caulk to fill any gaps.
- Outdoor primer and paint or stain (I used blue and black).
- Connecting hardware to join the wood pieces together at the back.
I used flat, metal mending plates with small wood screws and wood glue to connect the wood pieces, and adhesive suitable for glass and mirror to attach everything to the mirror.
I always use GE II Silicone Sealant which works as an adhesive on many surfaces. I have not tested other adhesive products outdoors but use whatever you like best. - Clamps (if gluing the pieces together)
- Mirror clips or other hardware to secure the mirror to the back of the frame (if it isn’t already).
- Hanging hardware (to hang up mirror).
- 2 hinges and 1 door handle (ornamental).
- Saw – preferably an electric miter saw
- Sandpaper or palm sander
- Scissors
- Pencil
- Measuring tape
- Scotch tape (or some sort of removable tape to hold template papers in place).
- Paint brush
- Gloves, apron, rag

Make a Template
I put the mirror on a table and then created my template on top of it.
You could either cut out strips of paper using the wood as a template (for the width of the paper strips) or simply draw the whole thing on a large piece of paper and cut out the pattern pieces.

Have a look at the diagram (above) for guidance.
Many of you will probably be able to make the project simply by seeing the diagram and making the template.
If written instructions help, keep going. Otherwise, draw a design you like on paper, cut out the wood, and go for it!
Outer Frame Parts A and B – 2 of each
Decide whether you want to make mitered or butted corners.
I made mitered corners and created an outer frame that is larger than the mirror by 1″ on each side (2″ total) to allow room for attaching the mirror to the back of the frame.
Inner Frame Parts C (2), E, F, G, H, I
The inner frame has 4 sides plus the inner wood pieces forming a cross.
Create your paper template in this order:
- E- Fits the inside space next to A.
- G- is parallel to A (the outer frame) and placed equal distance from the top and bottom B pieces.
- There’s also a gap between G and the nearest A (which helps create the illusion of the window being open).
- First determine the desired location of G but hold off with the length for now.
- G has two angled cuts but you need the C pieces first.
- C – These two pieces are the same (you just turn one over after cutting it out).
- The C pieces have two angled cuts (labelled 1 & 2, and 5&6). With G and E in place, cut out the C pieces to fit nicely against them.
- See how cuts 3 & 4 on the G piece line up with the outer edges of the C pieces? Trim G at the top and bottom using the outer edges of the C pieces as your guide.
Make the Inner Cross
With E, G, and the two C pieces taped in place, make the inner cross pieces.
- F is placed parallel to E and G, and slightly closer to G than E.
- F has two angled cuts (7&8).
Make H and I
With F also taped in place, create H and I.
- H will be slightly longer than I (because F is slightly closer to G than E).
If it looks good, you’re ready to cut the wood.

Cut Wood, Paint, & Assemble
- Label each pattern piece and trace them onto the wood.
- Cut out the wood.
- Sand any rough edges.
- You can either prime and paint (or stain) first or after assembly. Add paintable caulk first if you don’t want any gaps.

Here’s a close-up of the lower left corner:


Here’s the project before I stained primed and painted it:
I assembled mine with metal mending plates and small wood screws (on the back) and wood glue to connect the wood pieces.

I held everything in place with clamps while the wood glue was drying.

I painted the outside and edges blue and the back side black.
The wood is attached to mirror using adhesive. I used GE II silicone sealant. Some people like to use construction adhesive but I have not tested it myself in this application.
Whatever you use, make sure it’s suitable for glass/mirrors and wood, and do not apply it near the edges where it will be reflected by the mirror.
Secure the mirror to the back of the frame. I used mirror clips.
Add hanging hardware. I used heavy duty picture hanging hardware.

In these next pictures you can see how the black paint on the back adds a neat effect:


The hinges and handle came from the thrift shop and were mismatched so I spray painted them with a copper colour to unify the look.

It’s a fun project either for indoors or outdoors.
Resources
Empress of Dirt
FREE TIP SHEET
DIY Optical Illusion Mirror
File includes tips and design ideas for this project from the article.
The download link will be sent to your email.
Joining our free newsletter list is optional at checkout.
This project is included in this ebook:
Ebook

25 Garden Art Projects & Ideas
by Melissa J. Will
Grab the top garden art DIY projects and tips from Empress of Dirt
About This Ebook | Visit Ebook Shop
This ebook is a digital file (PDF format) you save to your device. It is not a physical product.
PayPal, Credit Card, Apple Pay
I also made a miniature version for the fairy garden.
~Melissa the Empress of Dirt ♛