Forget toothpicks! Try this easy, no-fuss method to root avocado pits. It takes little effort and lets you see exactly which ones will germinate before potting.
Once you’ve got your seeds established, use this guide on Growing Avocado Plants as Houseplants.
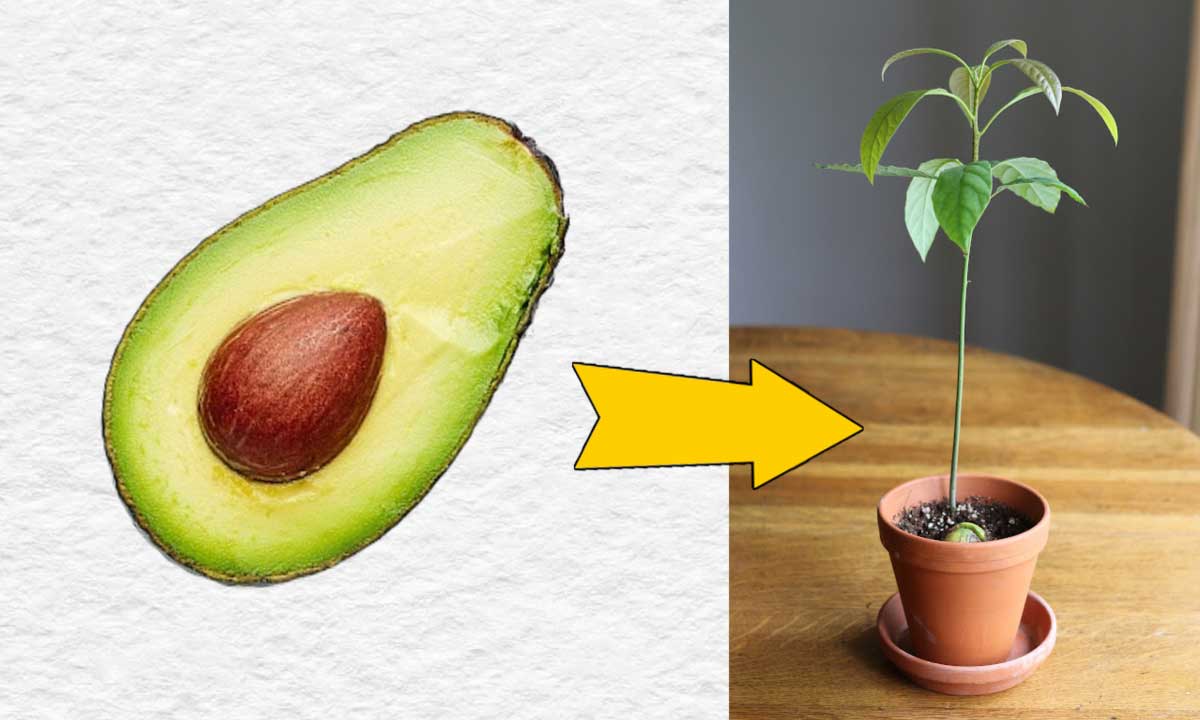
Grow an Avocado Seed

Forget the toothpicks and water! And don’t bother with the plastic gizmo on Amazon that suspends the seed over water. This method (below) works better. With just a few household supplies you can make your avocado seeds sprout.
I have tested this easy method on a lot of grocery store avocados and the germination rate is quite good.
I don’t like the toothpick method because it’s fussy, requires more effort, can rot the seed, and is not as reliable.
You can also try sprouting avocado seeds directly in moist potting mix, but that too can be hit and miss.
By using the method shown below you can know ahead of time if the seed will actually grow before bothering to plant it.
Before You Start
A little reality check. Odds are your avocado plant is not going to produce fruit, or, if it does, it will take many years and may not produce good fruit.
Growing an avocado from seed is the slowest and least reliable way to get true (same as the parent) fruit.
Commercial growers use grafting methods to ensure fruit quality and quantity that are not really possible for home growers.
But, starting a plant from the seed (also called the “pit”) is an easy way to grow a free houseplant. If it does fruit, it could take as long as 8-20 years. Grafted avocados produce fruit in 2-3 years.
The actual pollination process in rather unusual and intriguing and worth further reading if you are interested.
So, start saving those pits and get growing.
There is an option to save the instructions at the bottom of the page.
You can also use this same method for growing mango plants from grocery store fruit.
I’ll show you how to sprout your seed, plant your seed, and care for it as a houseplant.
Easy Way to Grow an Avocado Seed

It takes 4-6 weeks for avocado seeds to be rooted and ready for planting.
Prepare The Seed
You will need one ripe avocado fruit, paper towel, and a plastic food bag.

Remove the seed (pit) from a fresh, ripe avocado. Avoid using a knife where it might damage the seed.
Gently clean the seed under warm, running water using a soft brush or cloth ensuring all flesh is removed.

Wrap the seed in a sheet of damp (not dripping wet) paper towel or a tea towel.
Place in a plastic food bag (do not zip shut) and store in a dark cupboard at room temperature (around 70°F / 21°C).
If you have several, start them all at once to increase the odds.
Watch For Growth
Check on your seed every 4 days or so. I put a reminder in my phone calendar so I don’t forget.
At first you just need to ensure the paper towel stays damp. After a few weeks you’ll start to notice signs of germination.

When the seed is germinating, it will gradually crack open, revealing a deep split, and, eventually a root (or roots) will grow from deep inside the seed.
Do not break the seed apart: the seed body feeds the root growth, and the roots are delicate, so handle with care and do not break them.
The next photo shows avocado seeds after a month in the damp paper towel.

Notice how they germinate at different rates.
Some are just getting started. Two are doing well. One is refusing to budge.
I will give these ones another few weeks and then plant the strongest ones.
It’s helpful to know that no two sprouted avocado seeds look exactly alike. There are many crazy variations!
If the roots are growing in all different directions, don’t worry. The plant will sort things out later.
When the root is 3-inches long (there may be several roots), your seed is ready for planting in a flower pot.
Keep reading for tips on how to plant the sprouted seed.

How to Plant a Sprouted Avocado Seed
Supplies
- Sprouted avocado seed
- 8-inch flower pot with drainage holes (for a 2-inch avocado seed)
- Indoor potting mix for houseplants
Avocados like good drainage so you can also amend the potting mix with perlite or sand if you like.
How to Tell the Top From the Bottom

When it’s time to plant the sprouted seed, it’s helpful to know the top from the bottom so you can place the bottom down and top facing up.
Some avocado seeds are quite round and it’s not obvious but here are some clues:
- The top is (usually) tapered or pointy.
- The bottom is often broader and flat with a round, scaly marking.
- The roots will (usually) grow out the bottom but not always.
If you really can’t tell, no worries. Just following the planting instructions and the plant will sort it out.
Plant The Sprouted Seed
To plant, fill the pot half way with potting mix and gently place the seed in the pot.
Handle with care so the roots do not break.
If your root (or roots) are much longer than your pot size, you risk snapping them during the potting process while trying to fit everything into the pot.
If you can’t use a larger pot, you can selectively cut them back—but don’t overdo it. Use sharp scissors cleaned with rubbing alcohol or bleach solution (4 teaspoons bleach per quart of water for at least one minute).
It is said that root pruning (trimming) can also help produce a bushy rather than a tall, leggy plant but I have not found research to confirm it.
The roots may also be growing in all different directions and/or you may not be able to distinguish a root from a shoot. If so, just be sure to place everything root-like under the soil surface. The plant will know what to do from there.
While steadying the seed, gently press down the potting mix and add more as needed, leaving the top inch of the seed above soil level. If you don’t already have a stem, one will grow.

Water (room temperature distilled water) until moist, not damp. Top up the potting mix as needed.
Place in warm, draft-free location with strong, indirect light.
As it grows, leaves will form.


Caring for Your Avocado Plant
Save The Instructions
Empress of Dirt
FREE TIP SHEET
How To Grow Avocado From Seed
Includes basic growing tips from this article.

The download link will be sent to your email.
Joining our free newsletter list is optional at checkout.
Growing Tips
Avocado | Genus: Persea
Tropical plant
• Light: Full, indirect sun
• Humidity: Moderate to high
• Soil: do not dry out
• Fertilizer: houseplant fertilizer 7-9-5
• Shape: Pinch back top leaves to encourage new side shoots
• Room Temperature: 60° to 85°F (16° to 30°C)
Propagation
• For Fruit: Start with a grafted tree
• For Fun: Grow seed into non-fruiting houseplant
For complete growing instructions see How to Grow Your Avocado Tree Indoors. This includes tips for planting, choosing potting mix, best containers, pruning and pinching, repotting, and if the plant might flower.
Dropping Leaves or Leaves Turning Brown?
This is common with seasonal changes indoors. Change of light and humidity can make the plant sulk: leaves may turn brown and drop. Don’t give up: mine rebound when winter is done and we have the central heating off once again.
Avocado Trivia
- The word ‘avocado’ originates from a word meaning ‘testicle’. Yes, that’s the first time that word has come up in my garden writing.
- The fruit of an avocado (the part we eat), is actually a large berry and the pit is a seed.
- Avocados are considered a healthy food choice, providing (primarily) monounsaturated fat, vitamins B6, C, E, and potassium, magnesium, and folate.
- Avocados are much richer in potassium than bananas (which are always heralded as potassium-rich).
- Bananas have 358 mg per 100 grams. Avocados have 485 mg per 100 grams.
- Avocados must be left to mature on the tree but then ripen after harvesting. The hard, green fruit can take two weeks to ripen, although this is faster if exposed to ethylene gas.
- Grafted avocado plants produce fruit with a few years compared to germinated seeds (8-20 years).
- The pollination process for avocados is interesting: on day one female flowers open; on day two they are male and shed their pollen.
- There are three species of avocados and many varieties. Fruit sizes and tastes vary.
- 1. Guatemalan (Persea nubigena var. guatamalensis L. Wms.)
- 2. Mexican (P. americana var. drymifolia Blake)
- 3. West Indian (P. americana Mill. var. americana)
- If you do not live in a growing area, the avocados in your grocery store probably always come from the same few sources (depending on import/export laws).
~Melissa the Empress of Dirt ♛

How to Grow Avocado From Seed
Equipment
Supplies & Materials
- 1 Avocado ripe
- 1 Tea towel or paper towels
- 1 Food container or plastic food bag
- 1 8-inch Flower pot with saucer
- 1 bag Potting Mix
Instructions
Prepare Avocado
- Remove seed (pit) from a ripe avocado. Do not let knife touch seed to prevent damage.
- Gently wash seed under warm running water removing any avocado flesh.
- Take a before photo.
Start Rooting Process
- Wrap seed in damp (but not soaking wet) tea towel or paper towel.
- Place wrapped seed in food storage container or plastic food bag in dark kitchen cupboard. Do not seal bag/cover container or seed may get moldy.
Check Seed
- Check seed every 4 days or so by carefully unwrapping cover.
- Look for any visible changes and take more photos.
- Ensure towel is still moist and return to container.
- At first the seed will start to crack open (this is good) and one or more roots will grow from inside.
Plant Rooted Seed
- After approximately 4-6 weeks, the root should be around 3-inches long and ready to plant.
- Plant in 8-inch flower pot with roots facing down (or sideways if they grew that way).
- Cover in potting mix with top half-inch of seed above soil level.
- If roots are too big for pot, trim away excess, then plant and water.
Avocado Plant Care
- Grow your plant in a draft-free location with strong, indirect light.
- Avocado plants enjoy moderate to high humidity: never allow your plant to dry out.
- Use 7:9:5 fertilizer as directed.
- Keep taking photos to monitor growth.
Notes
- For more tips on avocado plant care see How to Grow an Avocado Tree.
- To grow a mango plants, see How to Grow Mango From Seed.
- For ginger, pineapple, and more see The Kitchen Propagation Handbook.
Ebook

Kitchen Propagation Handbook
7 Fruits & Vegetables To Regrow As Houseplants
by Melissa J. Will
Learn how to grow houseplants from avocado, oranges, lemons, ginger, and more using leftover pits, seeds, and roots.
PayPal, Credit Card, Apple Pay
This ebook is a digital file (PDF format) you save to your device. It is not a physical product.
