This step-by-step tutorial shows how to take cuttings from rosemary plants and grow them into new plants. These propagation tips work indoors or outdoors and the process takes 4 to 8 weeks.
This is one of many tutorials showing how to propagate plants.
Propagating Rosemary From Cuttings

Rosemary
Salvia rosmarinus formerly named Rosmarinus officinalis
is a tender perennial herb and woody, evergreen shrub. It is hardy in zones 9 to 10.
Want to grow more rosemary plants from the one you have?
The easiest way to grow a new rosemary plant is by taking a cutting from an existing plant. If your plant has several stems (or more)—at least six inches long—that are growing nicely, it is a good candidate for donating some cuttings for propagation.
You do not need a greenhouse or any special equipment to grow cuttings. All it takes is a donor plant, a few basic supplies, and a sheltered location, indoors or outdoors.
The process is simple. You take a cutting, let it form roots (either in water or growing medium), and grow your new plant.
A stem from this type of plant cutting usually takes about 4 to 8 weeks to establish new roots.
While rosemary is not hardy in cold climates (meaning it cannot withstand freezing temperatures), it is a “tender perennial” and can live for years in warmer conditions. This explains the difference between annuals and perennials.
Those of us with true winters in hardiness zones 4 to 8 can grow rosemary outdoors in the summer. Come fall, it needs protection. Some varieties do nicely indoors by a sunny window. Others can be overwintered, keeping the plant protected and dormant (but above freezing) until the risk of frost has passed in spring.

Rosemary Name Change
We know it by the common name rosemary but your plant tag may have the original botanical name Rosmarinus officinalis or the current name Salvia rosmarinus.
After DNA testing confirmed its close relationship to sages (salvias), rosemary was reclassified to the salvia genus in 2018.
It takes years for these changes to reverberate through the horticultural world but it’s helpful to know in case you do encounter the new name. And no worries—it’s still the same plant and the growing tips remain the same.
What does rosemary look like?

While there are many varieties, many of the rosemary plants sold at our local nurseries look like miniature pine trees with very narrow, oval, gray-green leaves that cover the stems. Once you know what rosemary smells like, it’s easy to identify simply by the aroma.
Contents
How To Grow Rosemary From Cuttings
Overview
To propagate rosemary from cuttings:
- Take fresh cuttings from the mother plant.
- Remove the lower leaves.
- Bury the bare stem in moist growing medium or place in water in a warm location (room temperature) with indirect light until roots have formed.
- When roots are an inch (2.5 cm) or longer, plant in flower pot or ground.
Before You Start
Can’t I just stick a cutting in soil and grow it?
Yes, that works sometimes. And that’s how plenty of gardeners do it. But here’s the problem. It can be that simple and work but only because the conditions happen to be right. The rest of us who don’t happen to have everything just right need to make it so. I’m all in favor of trying the casual approach and you might just be lucky too. Otherwise, a detailed tutorial like this might be just what you need.
Can I root rosemary cuttings in water?
Yes. I personally prefer rooting cuttings in potting mix because I seem to get the most consistent results that way but you can also root them in small jars of warm water. Like any cutting, some will root, others will not.
When should I take rosemary cuttings?

Timing
It is best to propagate rosemary cuttings when:
- The plant is actively growing.
- There is at least 6-inches of new (current year) growth to snip off.
- The newest stems are mainly green and nimble (not woody).
- The plant is not budding or blooming.
The green stems are called “softwood” or “ripe” or “semi-ripe” depending on how far along they are. Once they are woody they are “hardwood.”
Here in southern Ontario, new stems are ripe in June, semi-ripe in July, and mostly hardwood by late August. And, any growth from previous years is hardwood.
You can root them at any of these stages but softwood or ripe and semi-ripe are fastest.
The best time of day to take cuttings is morning when it is nicely hydrated.
How many cuttings can I take at one time?
Assuming you want to continue growing the mother plant, the general rule to never remove more than 1/3 of the plant at one time. This way the mother has lots of resources left to continue on—those stems and leaves are needed for photosynthesis.
Want to Grow Cuttings Next Year?
If your rosemary plant is fairly small or does not have many stems, you can prepare it now (in summer time) for propagation next year. To do this, cut back several stems by one-third to encourage side shoots to form. By next year you should have a bushier plant with plenty of new growth to use for cuttings.
Other Plants To Propagate This Way
There are dozens of plants you can propagate using this same method. This tutorial on how to grow new plants from softwood cuttings lists more options including geranium (Pelargonium), lilac, lavender, oregano, and honeysuckles.
About Plant Patents
Some plants are patented and asexual reproduction is not permitted without permission from the patent holder. Patents and trademarks are usually listed on plant tags.
Supplies
For collecting cuttings

- Moist paper towel*
- Plastic food bag*
- Clean, sharp snippers or scissors
*to keep cutting hydrated if you won’t be processing it immediately.
For rooting the cuttings

- Flower pots with drainage holes and saucers
Small pots (2 to 4-inch diameter): 1 to 2 cuttings each
Medium pots (6 to 9-inch diameter): 3 to 6 cuttings each - Potting mix (or mixture of half perlite and half vermiculite)
- Plastic food bag (optional—for humidity dome)
- Dibber or chopstick (optional—to create planting hole and hold up humidity dome)
These are my favorite plastic flower pots with saucers at Amazon. They come in various sizes and work nicely both for propagation projects and houseplants.
During next 4 to 8 weeks
- Warm location (70 to 80°F or 21 to 27°C), humid (50%+), indirect light, protected from wind and rain. Can be indoors or outdoors.
Preparations
Fill flower pots with moist potting mix, ready for your cuttings.
The moisture level is right if you can squeeze the potting mix in your hand and it forms a ball but water does not drip out. If yours is too dry, add water. If it’s too wet, add additional dry potting mix.
Small flower pots (2 to 3-inches in diameter) work nicely for one or two cuttings each.
Medium flower pots (6-inch diameter or more) can hold several cuttings.
If you plan to use a plastic food bag or something similar as a humidity dome, have it ready to go.

Take Cuttings

Read this entire section first before taking your cutting.
Have your moist paper towel and plastic food bag ready if there will be a time delay between cutting and processing.
Using clean snippers, take a cutting (or cuttings) from your rosemary plant (“the mother plant”).
If you can, take a bunch of cuttings to improve your odds.

It’s not a hard rule but generally 6-inches of stem (or longer) works nicely.
If your rosemary plant has much longer stems, you can use a long cutting (e.g. 12-inches) and cut it into two cuttings that can both be rooted. Cool, right? I show how to do it in this section.
Where To Cut
As with many plants, you want to cut the stem just below a leaf node. This is where leaves grow on stems. Directly below this spot some plants have meristematic cell tissue that can actively divide and, in this case, form new roots.
Rosemary plants make it easy to take stem cuttings because their stems are covered in leaves all the way along. Basically you can cut just below any leaf and it’s a good cutting.
The Tip Versus The Base

For the next step, you will need to know the base versus the tip of the cutting. This is not always obvious to new gardeners but rosemary offers a big hint.
On rosemary stems, the leaves grow upwards at a 45-degree angle. The tip is where new growth is forming. The woodiest part of the stem is toward the base and that’s the part we’ll submerge in the potting mix.

Remove Lower Leaves

Single Six-Inch Cutting | To root the stem cutting, we want to remove the leaves from the lower half of the stem and keep the upper leaves in place.
The leaves come off easily by gently pulling from mid-stem to base.
12-Inch Cutting | Cut the stem in half and continue just as you would with a 6-inch cutting. Remove the leaves from the lower half of each stem and keep the upper leaves in place.


18-Inch Cutting | Cut the stem into three six-inch sections and continue just as you would with a 6-inch cutting. Remove the leaves from the lower half of each stem and keep the upper leaves in place.
Root Your Cuttings


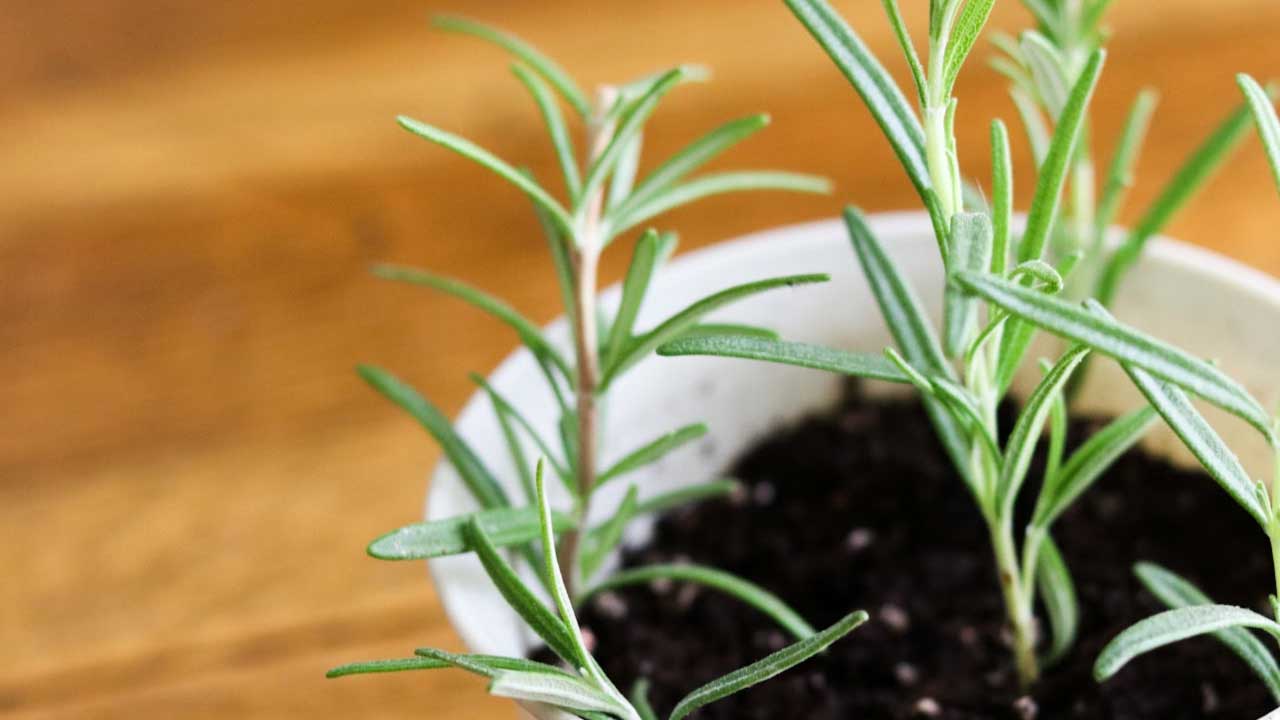
Plant each stem in moist potting mix so the lowest leaves are just above soil level and gently press potting mix in place. Stem should be standing straight.
You can place one (or two) cutting(s) per small pot (2 to 3-inches in diameter) or several in a medium pot (6-inch diameter or more). Allow a couple inches between cuttings so the roots don’t get tangled.

Remember how we said the plant has special cells on the stem that can produce roots? With a few inches of stem submerged in the potting mix, there will be lots of opportunities for new roots to form.
What if a cutting is quite woody?

If base of your cutting is fairly woody, you can “wound” it to help stimulate root growth. Using a scalpel or fine knife, carefully peel or slice off the lower inch of outer bark (wood) from the cutting.
Alternately, you could use a rooting hormone powder. Be sure to get the type made for “hardwood” cuttings if applying to hardwood. It is not needed for softwood (ripe) and semi-ripe cuttings. This explains more about using rooting hormone products.

How do you root rosemary cuttings in water?

To root a rosemary cutting in water, the steps are the same but instead of submerging the prepared cutting in moist potting mix, you place the leaf-free section of the stem in a small jar or cup of warm water. The leaves must be above water.
Change the water every day or two and follow the care tips below while waiting for roots to form. When roots are an inch or longer, your new rosemary is ready for planting.
Care While Roots Are Forming
While waiting for roots to form over the next month or two, keep your cuttings at approximately 70 to 80°F (21 to 27°C) either indoors or outdoors. You want warmth, moderate to high (not low) humidity, and indirect light, sheltered from wind and rain.
If humidity levels are below 40%, use of a humidity dome may help keep the cutting hydrated. A simple way to do this is to place a clear, plastic food bag over everything and use something like a chopstick to prop it up, careful not to let the plastic touch the plant while still allowing air flow.
Keep the potting mix moist but do not over— or under— water. Your finger tip is a good, free tool for detecting the moisture level: if it feels dry an inch deep, it needs watering. Or you can use a simple moisture meter.

Moisture Meter on Amazon
Checking For Roots
The time it takes for roots to form is going to vary a lot depending on the plant and conditions.
This may be anywhere from 1 to 2 months.
If you notice your rosemary is drying out or leaves are dropping, that’s a big clue this is probably not going to succeed.
If the leaves remain healthy looking and/or more grow, you’re winning this one.
Two ways to check for roots:
- Look at the underside of the flower pot – are any roots visible at the drainage holes? If yes, cheers—and you can now move the plant to a bigger pot or plant it out in the garden.
- Gently pull on the stem—is it anchored to the growing medium? If you feel some resistance, that’s a good sign that roots are indeed forming.
One advantage to rooting cuttings in water is, of course, that you can see any roots forming at a glance.

Planting Your New Rosemary

Congratulations on propagating your rosemary cutting.
From here, the growing instructions are the same as they are with a purchased plant.
Generally, in cold climate gardens where we have hot summers and cold winters, we can grow rosemary as a single season annual or a tender perennial that needs winter protection.
If you want to grow your plant for several years, I strongly recommend planting it in a large container that you can move in and out of the house.
Use an organic potting mix made for food crops.
Once potted, assuming it’s still summer, gradually transition your rosemary to outdoor growing conditions over a week or two—the same way we “harden off” plants around last frost in spring.

Fall & Winter Care
In late summer or early fall, depending on your zone, it’s time to prepare the potted rosemary for life indoors.
To protect your other houseplants, it’s best to take your time and do what you can to ensure neither the plant or soil is carrying any pests or diseases.
Keep rosemary on a sunny windowsill (70 to 80°F or 21 to 27°C) for the winter and make sure the soil does not dry out.
I find they do tend to drop leaves in winter, probably because our home is kept on the cool side with lower humidity, not the recommended 70 to 80%.
But, if kept alive, rosemary can rebound once it is returned to its preferred outdoor growing conditions after last frost in spring.

Resources
Rosemary | Genus: Salvia | Lamiaceae family
How to Grow Rosemary From Cuttings
Rosemary Growing Tips
Tender perennial, fragrant herb and woody, evergreen native to Mediterranean regions
- Botanical Name: Salvia rosmarinus (formerly Rosmarinus officinalis)
- USDA Hardiness Zone: 8 up (depends on variety)
- Sun: 6+ hours full sun or indoor south-facing window
- Soil: pH 8.5, light, alkaline growing medium
- Water: allow top inch of soil to dry before watering
- Propagate: take cuttings during active growing season: not while budding or blooming
- Prune: trim back stems to encourage side shoots and bushier plant
- Flowers: blues and purples, after 2nd year
- Uses: leaves-culinary (dried or fresh), medicinal, oils
- Pollinators: various bees
- Pests: aphids, red spider mites, spittlebugs, whiteflies
- Diseases: mold, powdery mildew, root rot
Ebook

Kitchen Propagation Handbook
7 Fruits & Vegetables To Regrow As Houseplants
by Melissa J. Will
Learn how to grow houseplants from avocado, oranges, lemons, ginger, and more using leftover pits, seeds, and roots.
PayPal, Credit Card, Apple Pay
This ebook is a digital file (PDF format) you save to your device. It is not a physical product.
Ebook

Seed Starting for Beginners
Sow Inside Grow Outside
by Melissa J. Will
Everything you need to get started with indoor seed starting for indoor and outdoor plants. Grow what you want—any time of year!
PayPal, Credit Card, Apple Pay
This ebook is a digital file (PDF format) you save to your device. It is not a physical product.
More Propagation Tutorials
Also see 20 Plant Propagation Tutorials For Gardeners
More About Herbs
Tips For Growing Herbs Indoors
Tips for Growing Herbs Outdoors
~Melissa the Empress of Dirt ♛

How To Propagate Rosemary Cuttings
Equipment
- 2 Paper towels moist
- 1 Plastic food bag
- 1 Flower pot small, with saucer
Supplies & Materials
- 1 6-inch Stem from rosemary plant or longer
Instructions
- Moisten potting mix with water and fill small flower pot.
- Take 6-inch (or longer) fresh, green (not woody) cutting from rosemary plant.1 6-inch Stem from rosemary plant
- Gently peel off leaves from lower half (base) of stem.
- Submerge stem in potting mix so lowest leaves are just above soil level. Press potting mix in place so stem stands firmly in place.
- Keep in indirect light in sheltered location at 70°F (21°C) or a bit warmer with moderate to high humidity. Do not allow potting mix to dry out.
- In 4 to 8 weeks when roots have formed, transplant to permanent growing location.